What Are the Stages of a Bathroom Renovation? Auckland Guide
Originally posted on What Are the Stages of a Bathroom Renovation? Auckland Guide
Superior Renovations - Auckland’s Trusted Home Renovation Specialists
Quick answer: A full bathroom renovation in Auckland moves through 8 key stages — from initial design and consent through to demolition, waterproofing, tiling, fit-out, and final handover — typically taking 3–4 weeks on site once all materials are ordered and the design is locked in.
Here’s something we hear a lot at Superior Renovations: “We just didn’t know what to expect.” People book a bathroom renovation, get excited about tiles and tapware, and then suddenly there’s a waterproofer on the phone asking about membrane systems and a plumber who needs to talk about rough-in positions. The whole thing starts to feel less like a renovation and more like a project management degree.
➡ Get an instant estimate with our Bathroom Renovation Cost Calculator
It doesn’t have to be that way. Understanding the stages of a bathroom renovation — what happens, in what order, and why — takes a massive amount of anxiety out of the process. A well-run bathroom reno isn’t chaotic; it’s a precise sequence of trades that, when coordinated properly, flows surprisingly smoothly. When it doesn’t flow smoothly, it’s almost always because that sequence was ignored, rushed, or handled by people who didn’t communicate with each other.
We’ve been renovating bathrooms across Auckland — from compact ensuites in Parnell apartments to full family bathroom overhauls in Henderson, Albany, and Remuera — since 2016. We’ve seen what happens when stages are skipped (spoiler: it usually involves water damage and re-doing expensive work), and we’ve seen what happens when it’s done right. This guide walks you through every single stage, including the behind-the-scenes prep work that most renovation articles don’t mention.
Whether you’re working with us or planning your own reno, this is the roadmap you need. We’ll cover what happens, what questions to ask your renovation company at each stage, what consent looks like in Auckland, and what the real timeline looks like in 2026. We’ll also flag where things commonly go sideways — so you can make sure they don’t.
One thing to note before we dive in: a bathroom renovation is widely considered the most complex renovation per square metre of any room in the house. It involves more trades, more compliance requirements, and more coordination touchpoints than almost any other project. The good news is that complexity is manageable — when the person running it knows what they’re doing.
Stage 1 — Design: Getting Your Vision on Paper Before Anyone Touches a Wall
The design stage is where your bathroom renovation either sets itself up for success or quietly plants the seeds of its own frustration. It’s not glamorous. It doesn’t involve hammers or tiles or that gorgeous matte black tapware you’ve been eyeing. But every hour spent getting the design right saves three hours — and a significant amount of money — during the build phase.
What Happens During the Design Consultation
Your first design consultation is about listening, not presenting. A good designer will want to understand how you use your bathroom, who uses it, what you can’t stand about it right now, and what you love about bathrooms you’ve seen elsewhere. They’ll ask about your budget range, whether you want to keep or move the toilet (moving it has significant plumbing cost implications, which we’ll get to), and whether there are any accessibility or future-proofing considerations.
They’ll take measurements. Detailed ones. The exact position of windows, doors, existing plumbing rough-ins, and load-bearing walls all matter. In many Auckland homes — particularly older villas in Grey Lynn, Mt Eden, or Ponsonby — the existing layout throws up surprises that only become visible once you start measuring properly. Finding these constraints during design, rather than during demolition, changes the outcome enormously.
💡 Quick tip: Bring reference images to your design consultation — not necessarily bathrooms, but any images that capture a mood, material, or feeling you want. Pinterest boards, magazine clippings, even a photo of a hotel bathroom you loved. It gives the designer a visual language to work with.
Concept Plans and 3D Visualisations
Once the designer has gathered all the information they need, they’ll produce concept plans showing the proposed layout — where each fixture sits, where tiles start and stop, where the vanity goes, shower dimensions, niche positions. For more complex projects, or for clients who find it hard to visualise a space in 2D, 3D renders give you a photorealistic preview of the finished bathroom before a single tile is ordered.
“The layout phase is where we make the big decisions that are expensive to undo later — shower size, niche placement, vanity height. Getting these locked in early, with proper plans, means the trades have a clear brief and there’s no confusion on site about what goes where.”
— Cici Zou, Designer, NZ Dip. Interior Design, Certified Designer, Superior Renovations
Materials and Fixture Selection
With the layout confirmed, you move into material selection. Tiles, vanity, tapware, shower system, toilet suite, mirrors, lighting, hardware. This is the fun part — but it can also be the slow part if it’s not managed. The order in which you select materials matters: tiles drive most other decisions (grout colour, tapware finish, vanity palette), so they’re usually chosen first.
At Superior Renovations, we take clients through supplier showrooms including Reece for tapware and bathroom fixtures and The Tile Depot for tiles, so you’re choosing from real samples under real lighting — not guessing from a screen. Nothing kills a reno timeline like indecision on materials two weeks into the build. Getting selections locked before demolition starts keeps everything on track.
Fixed-Price Quote and Contract Signing
Once design is finalised and materials are selected, you receive a detailed fixed-price quote. This isn’t a rough estimate — it’s a line-by-line breakdown covering every trade, every supply item, and project management. A fixed-price contract protects you from budget blow-outs and gives you a clear payment schedule tied to construction milestones. Review it carefully. If anything is vague, ask for clarification before signing.
This stage also locks in the construction start date and gives your project manager the information they need to pre-order materials and schedule trades. The design stage doesn’t end until the contract is signed and materials are on order — at that point, the handover from design to construction is complete, and the clock starts ticking toward your beautiful new bathroom.
Once design and contract are wrapped up, the next consideration — before a single tool arrives — is whether your renovation needs a building consent from Auckland Council. It’s a step many people don’t think about until someone mentions it at the wrong moment.
Stage 2 — Consents and Compliance: What Auckland Council Actually Requires
Building consent is one of the most misunderstood parts of a bathroom renovation. Some homeowners think every bathroom reno needs one. Others assume none of them do. The reality — as is so often the case in construction — sits somewhere in the middle, and getting it wrong in either direction creates real problems.
When Does a Bathroom Renovation Require Building Consent?
Under the New Zealand Building Act 2004, most like-for-like bathroom renovations — replacing fixtures in the same position, retiling, updating vanities and tapware — are classified as “exempt building work” under Schedule 1 of the Act and do not require a building consent.
However, you will need consent if your renovation involves any of the following:
Moving plumbing to a new location (relocating the toilet, shower, or basin to a different wall or position). Any structural alterations — removing or modifying walls, particularly load-bearing ones. Changing the size of windows or adding new openings. Converting a non-wet area into a wet area (for example, enclosing an existing laundry space into the bathroom footprint). Adding underfloor heating that is hardwired (low-voltage plug-in systems are generally exempt).
Important note: Carrying out work that requires consent without getting it is a serious issue. It creates problems when you sell — an LIM report will flag unconsented work, it can void your home insurance for claims related to that work, and Auckland Council can require you to remove and redo the work at your cost. Always clarify consent requirements with your renovation company before work begins.
How Long Does Consent Take in Auckland?
Auckland Council is required by law to process building consent applications within 20 working days — but the clock stops every time they request additional information, which is common for first-time applicants or complex projects. In practice, budget 4–8 weeks from lodgement to approval for bathroom projects that require consent in Auckland. This is why we always recommend confirming consent requirements at the design stage, not as an afterthought.
This timeline is reflected in Superior Renovations’ FAQ on the live site: if your bathroom reno requires consent, you need to account for that 4–8 week processing window before demolition can legally begin. Your project manager handles the consent lodgement and manages the back-and-forth with Auckland Council — that’s a core part of what you’re paying for in a project-managed renovation.
LBP Requirements and Restricted Work
Under the Building Act, certain types of work must be carried out by a Licensed Building Practitioner (LBP). According to building.govt.nz, restricted building work — which includes structural work and all weathertight elements — must be performed or supervised by an LBP and recorded on the project. In a bathroom renovation, this is most relevant for any structural work and for the waterproofing system, which must also produce a PS3 certificate (more on that in the waterproofing stage).
All tradespeople working on consented building work must also have relevant certificates of compliance — your electrician produces an Electrical Certificate of Compliance, your gasfitter produces a Gas Fitting Certificate. These aren’t optional extras; they’re legal requirements and are included in your handover documentation from Superior Renovations.
What If You’re in a Heritage Overlay Area?
Some suburbs in Auckland — including parts of Ponsonby, Remuera, and Grey Lynn — include properties on the Auckland Unitary Plan’s heritage register. Heritage overlays generally apply to exterior work rather than interior bathroom renovations, but it’s worth checking your specific property. Your renovation company or a resource consent specialist like Sonder Architecture can confirm whether any special conditions apply to your project.
With design locked and consent sorted (or confirmed as not required), the project is ready to move onto site. First up: everything that’s currently in your bathroom needs to come out.
Stage 3 — Demolition: Stripping Back to the Bones (and What You Might Find)
Demolition is the stage that makes everything feel real. One day you have a tired, outdated bathroom. Two days later, you have bare framing and subfloor. It’s dramatic, it’s a little bit chaotic, and — for most people — it’s genuinely exciting. It’s also where surprises live.
What Happens During Bathroom Demolition
A typical bathroom demolition takes one to two days for a standard 6–9m² bathroom. The demolition team removes all existing fixtures — toilet, vanity, shower or bath, mirrors, lighting, exhaust fans. They strip tiles from walls and floors (this is noisy, dusty work, so expect some disruption). Gib board is removed to expose framing. The old waterproofing membrane is stripped back to the substrate. Existing plumbing and electrical rough-ins are exposed, assessed, and either retained or repositioned per the design plans.
The demolition team should be surgical about what they remove and what they leave. Indiscriminate demo — ripping out anything that looks old — creates extra work and cost during the reinstatement phase. A well-briefed demolition team works from the same plans as every other trade, so they know exactly what’s being replaced and what’s being retained.

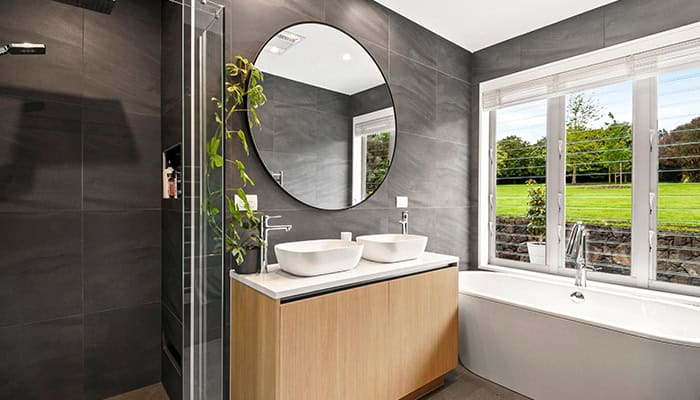
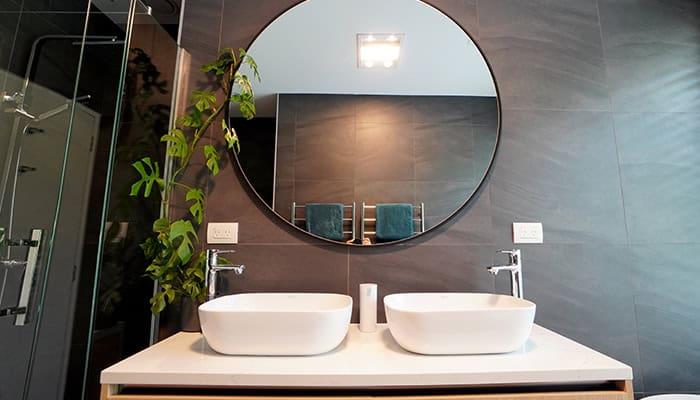
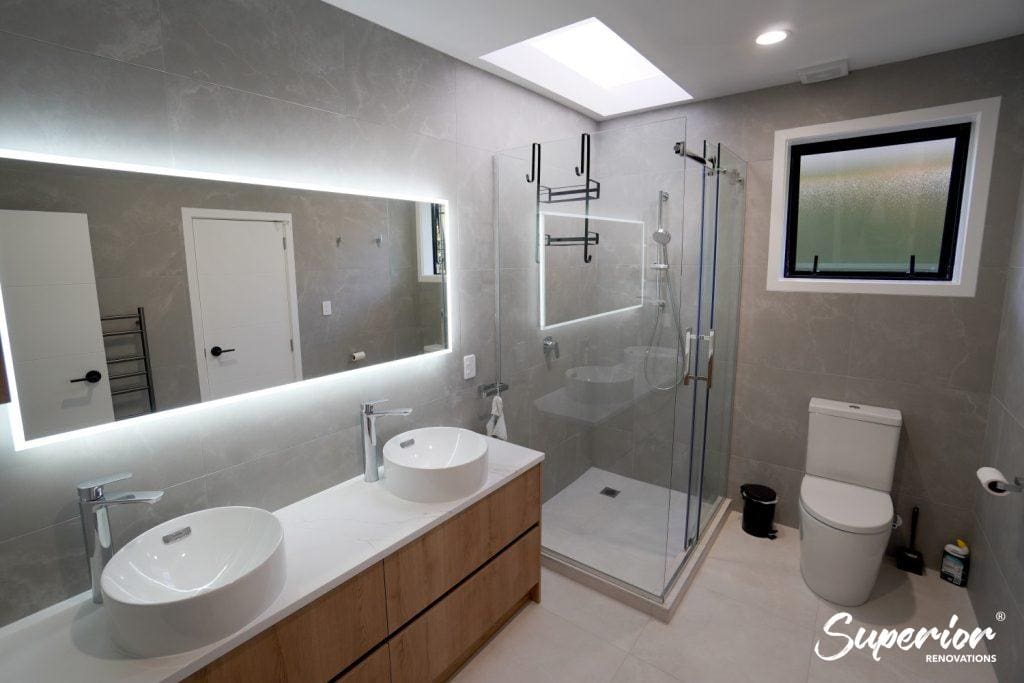
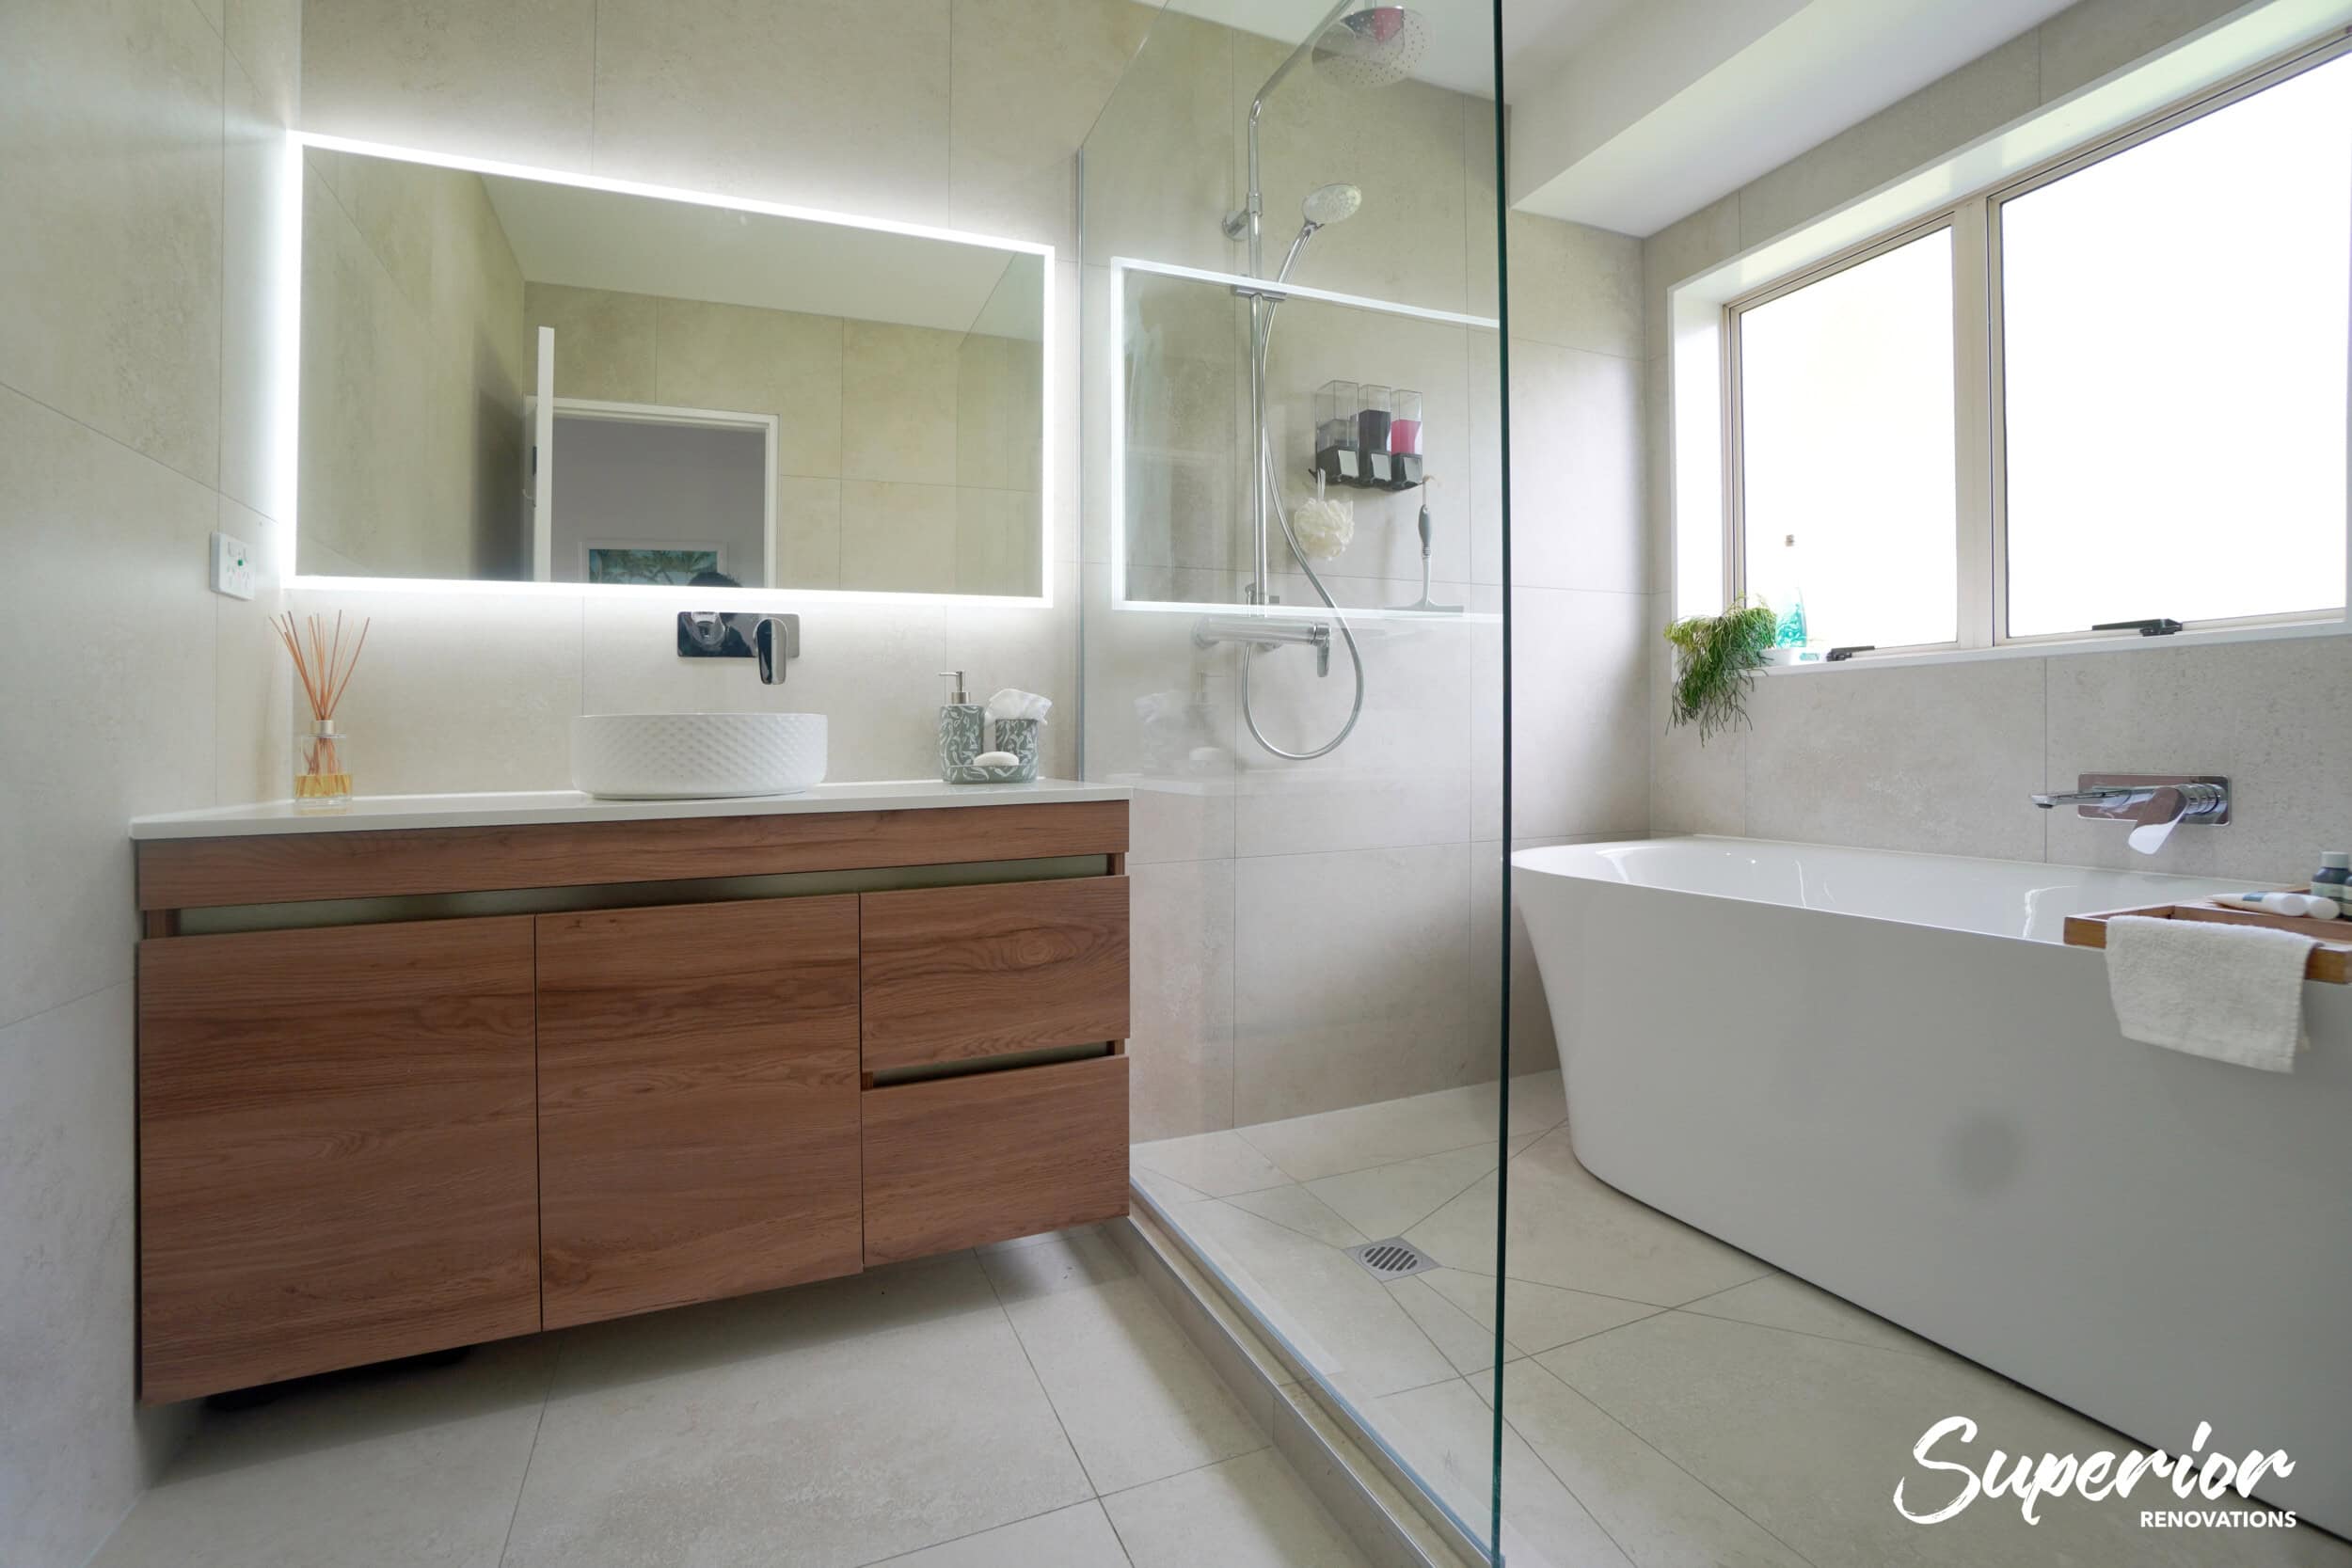
bathroom ideas auckland

bathroom ideas auckland
What You Might Find Behind the Walls
This is the bit that renovation TV shows have made famous — and for good reason. In older Auckland homes, particularly pre-1980s builds, it’s common to find things behind bathroom walls that weren’t visible during the design phase. Some of the most frequent discoveries include:
Deteriorated or absent waterproofing — many older bathrooms were built without proper membranes, relying instead on painted surfaces or basic sealing that has long since failed. Rotted framing caused by years of water ingress from inadequate waterproofing or cracked grout. Outdated wiring that needs to be brought up to current standards before new electrical can be installed. Asbestos in the substrate, texture coat, or adhesive in homes built before the mid-1980s (this triggers a separate asbestos management process). Substandard previous renovations — particularly common in rental properties where work was done cheaply or without consent.
💡 Quick tip: A good fixed-price contract will include a provisional sum for unknown conditions found during demolition. Ask your renovation company specifically how they handle unexpected discoveries — are they billed as variations, or is there an agreed process and price range? Knowing this upfront prevents nasty surprises.
Asbestos in Auckland Bathrooms
Homes built before 1990 — which covers a significant portion of Auckland’s housing stock, particularly in suburbs like Mt Roskill, Avondale, Henderson, and Papatoetoe — may contain asbestos-containing materials. Under WorkSafe NZ regulations, any material suspected of containing asbestos must be tested before disturbance. If asbestos is found, a licensed asbestos removal contractor must handle the removal before renovation work can continue. This adds cost (typically $1,500–$5,000+ depending on the extent) and time to the project. It’s not something any renovation company can predict in advance — but a good one will test early and manage the process professionally.
Subfloor and Structural Assessment
Once tiles and gib are removed, your project manager and lead builder should conduct a thorough inspection of the subfloor and framing. Any rotted or damaged timber needs to be replaced before new waterproofing goes on — covering compromised framing is one of the most common causes of problems down the track. If you’re in a house with a suspended timber subfloor (common in pre-1970s Auckland bungalows), the condition of the joists under the bathroom can be a genuine wildcard.
Demolition is done. The site is clear, the structure has been assessed, and any hidden issues have been addressed. Now the real build sequence begins — and it starts underground, with plumbing.
Stage 4 — Plumbing, Electrical and Framing: The Work No One Sees That Makes Everything Work
Here’s a counterintuitive truth about bathroom renovations: the most important work happens before a single tile is placed. The rough-in stage — plumbing, electrical, and framing — is entirely invisible in the finished bathroom, but it determines whether everything else performs as it should. Get this stage right and the rest of the renovation flows. Get it wrong and you’re chasing problems for years.
Plumbing Rough-In
The plumber arrives once demolition is complete and any structural framing work has been done. Their job at this stage is the rough-in: positioning all the supply pipes (hot and cold water) and waste pipes to the correct locations for each fixture as per the design plans. If the shower is moving from one wall to another, or the vanity is going to a different position, this is where that work happens — before anything gets closed in.
This is also the time to replace any old pipework that’s in poor condition. In many Auckland homes built in the 1950s–1970s, you’ll encounter galvanised steel pipes that have corroded internally over decades of Auckland’s slightly acidic water. Replacing these during a bathroom renovation — when the walls are already open — is far more cost-effective than doing it as a separate job later.
Plumbing work on drainage and supply must be carried out by a registered plumber under the Plumbers, Gasfitters and Drainlayers Board (PGDB). Any plumbing in a bathroom is restricted work under NZ legislation — not something that can legally be DIY’d or handed to an unlicensed operator.
Electrical Rough-In
Bathroom electrical is simultaneously more regulated and more critical than most homeowners realise. All electrical work in a bathroom must be carried out by a registered electrician, and bathrooms have specific zoning requirements under the Electrical Workers Registration Board (EWRB) standards. Zone 0 (inside the shower/bath), Zone 1 (directly above), and Zone 2 (the surrounding area) all have specific IP (ingress protection) ratings for any electrical fittings placed within them.
During rough-in, the electrician runs cables for all the lighting circuits, exhaust fan, heated towel rail, underfloor heating (if included), and any shaver socket or mirror LED supply. Bathroom lighting is often underestimated — proper task lighting at the vanity, ambient general lighting, and a dimmer circuit for a relaxed evening atmosphere are three completely different requirements that all need to be wired before the walls close up.
“We always spec three lighting layers in a bathroom — task at the vanity mirror, ambient overhead, and a low-level mood circuit. Getting all three roughed in properly means the homeowner has real flexibility in how the space feels. It adds very little cost at the rough-in stage, but it’s almost impossible to retrofit.”
— Eunice Qin, Designer, Superior Renovations
Framing and Stopping
With plumbing and electrical roughed in, any new framing goes up — walls for recessed niches, framing for new shower enclosures, backing for the vanity wall (which needs solid timber blocking to hold fixings for a wall-hung vanity). New gib board goes on, specifically moisture-resistant gib in all wet areas. Standard gib is not appropriate in bathroom environments; it will degrade over time regardless of how well the waterproofing above it is applied.
Stopping — the process of taping, coating, and sanding gib joints to a smooth finish — is done at this stage too. The stopping needs to be properly cured and primed before waterproofing can begin. Rushing this step causes problems with membrane adhesion. Your project manager should be sequencing these stages with enough lead time between them.
💡 Quick tip: This is a good time to confirm the final tile layout with your project manager and tiler. The stopping coat on gib needs to be finished to the correct flatness tolerance for large-format tiles (the larger the tile, the flatter the substrate needs to be). Checking this before waterproofing goes on prevents problems.
Underfloor Heating Installation
If you’ve chosen electric underfloor heating — popular in Auckland bathrooms as a practical luxury, particularly in the cooler winter months — the heating mat is laid at this stage, before waterproofing and tiling. PDL by Schneider Electric produce quality in-floor heating systems widely used in NZ bathrooms. The thermostat and control unit are also roughed in at this point, with final fitting happening after tiling is complete.

Plumbing and electrical rough-ins done. Framing completed. Substrate prepped. Now we get to the stage that arguably matters more than any other in a bathroom renovation — the one that determines whether your renovation lasts 20 years or creates expensive problems in five.
Stage 5 — Waterproofing: The Make-or-Break Stage Most Homeowners Don’t Think About
Ask any experienced renovation company in Auckland what the most common cause of failed bathroom renovations is, and you’ll get one answer: waterproofing. Not bad tiles. Not cheap tapware. Not dodgy grout. Poor or absent waterproofing is responsible for the vast majority of bathroom-related structural damage in NZ homes — and much of it goes undetected for years because it’s hidden behind tiles and vanity units.
What Is Bathroom Waterproofing?
Waterproofing is the application of a continuous, flexible membrane to all wet surfaces and the substrate surrounding them — the shower walls and floor, the area around the bath, and the bathroom floor as a whole. The membrane creates an impermeable barrier that prevents water from penetrating through tiles and grout into the substrate, framing, and subfloor below.
In New Zealand, bathroom waterproofing is governed by NZ Building Code Clause E3 Internal Moisture, which sets minimum requirements for wet area construction in residential buildings. The standard distinguishes between “wet areas” (the shower enclosure) and “potentially wet areas” (the rest of the bathroom floor), each with different minimum requirements for membrane application area and height.
The PS3 Certificate — Why It Matters
One of the most important documents you should receive at the end of a bathroom renovation is the PS3 waterproofing certificate. This is a Producer Statement (PS3) issued by a council-approved waterproofing specialist who is registered with the Plumbers, Gasfitters and Drainlayers Board. The PS3 certifies that the waterproofing design and installation complies with the Building Code.
At Superior Renovations, our PS3 is included as a standard part of every bathroom renovation handover pack. If a renovation company can’t produce a PS3 for your new bathroom, that’s a significant red flag — it means either the waterproofing wasn’t done correctly or it wasn’t done by a certified specialist.
Types of Waterproofing Systems Used in NZ
The most common systems used in Auckland residential bathrooms are liquid-applied polyurethane or acrylic membranes, which are painted on in multiple coats and bond directly to the substrate. Sheet membrane systems (torch-on or bonded) are used in higher-risk applications. Both systems have specific curing time requirements — the membrane must be fully cured before tiling begins, typically 24–48 hours depending on the product and ambient temperature. Auckland’s humidity can slow this down; rushing it is one of the most common waterproofing failures.
All membrane applications must extend to the correct heights — a minimum of 1,500mm on shower walls from the floor, covering the full shower enclosure. On floors, the membrane must extend at least 150mm up adjacent walls. Falls (drainage gradients) in the wet area floor must also comply with the NZ Building Code, directing water toward the drain rather than toward walls or the room threshold.
Inspections Before Tiling
If your renovation requires a building consent, Auckland Council will conduct a pre-tile inspection to sign off the waterproofing before tiling can begin. The inspector checks membrane application coverage, curing, falls, and junction detailing (particularly at wall-floor junctions, which are the most common failure point). Tiling before a required pre-tile inspection is passed is not legal — and it forces you to rip out perfectly good tiles if the waterproofing underneath fails inspection.
💡 Quick tip: Even on exempt (non-consented) bathroom renovations, ask for photographic documentation of the waterproofing installation at all key stages — pre-tile and post-application. This creates a record that can be invaluable if any warranty claim arises later.
Waterproofing passed. Now the bathroom starts to look like something. The tilers are next — and this is the stage most clients get genuinely excited about, because suddenly their material choices come to life in three dimensions.
Stage 6 — Tiling: Where Your Bathroom Finds Its Character
Tiling is where the design concept you spent so much time on during Stage 1 either comes to life brilliantly or falls flat. A great tile installation — set out correctly, consistent joint width, perfectly flat and plumb — elevates the entire renovation. A poor one — lippage on large-format tiles, inconsistent grout joints, poor corner detailing — makes everything feel cheap regardless of how expensive the tiles actually were.
Tile Set-Out and Planning
Before a single tile is adhered, an experienced tiler will plan the set-out — working out where the tile grid starts in relation to the room’s focal points (usually the shower wall behind the shower head or the main entrance wall) to ensure cuts are balanced and prominent features like niches are centred within a tile grid. Poor set-out planning results in awkward half-tile cuts in the most visible positions. It’s a planning step that takes an hour and makes an enormous difference to the finished result.
For large-format tiles (600x600mm, 600x1200mm, or larger — all popular choices in contemporary Auckland bathrooms in 2026), the substrate flatness requirements are stringent. BRANZ guidelines and the NZ ceramic tile standard AS/NZS 3958 require that large-format tiles are laid over surfaces with no more than 3mm variation under a 3-metre straight edge. This is why the framing and stopping stage matters so much — by the time the tiler arrives, the substrate needs to be flat.
Floor and Wall Tile Installation
Floor tiling typically happens before wall tiling in a full bathroom renovation. The floor tile bed creates the final falls toward the drain, so it needs to be set first. Wall tiles follow, starting from the lowest full tile course above the floor and working up. In the shower, tiles are applied over the waterproofing membrane using appropriate flexible adhesive — the type of adhesive matters, as standard cement-based adhesive can crack over time in a wet-area environment subject to thermal movement.
Tile selection from quality NZ suppliers makes a real difference. The team at The Tile Depot stock an extensive range of porcelain, ceramic, and natural stone tiles suited to Auckland’s climate — porcelain is generally the most practical choice for New Zealand bathrooms given its density, low water absorption, and durability in high-humidity environments.

“Tile selection is one of my favourite parts of the design process because it’s where the whole vision crystallises. The key thing I always remind clients is to think about scale — a small tile in a large shower can feel busy and dated, while a large-format tile in the same space feels contemporary and spacious. Scale matters as much as colour or texture.”
— Alison Yu, Designer, Superior Renovations
Grouting and Sealing
Once adhesive has cured (typically 24 hours minimum, or longer for large-format tiles), grouting begins. Grout joint width, colour selection, and the type of grout (cement-based or epoxy) are all specified in the design package. Grout colour has an outsized effect on the finished look — a dark grout against pale tiles creates graphic definition, while a tone-on-tone match creates a seamless, contemporary feel. Epoxy grout offers superior stain resistance and is increasingly specified in high-end Auckland bathrooms, particularly for floor joints in the shower zone.
After grouting, silicone sealant is applied at all movement joints — wall-to-floor junctions, internal corners in the shower, and around the bath surround. These joints accommodate thermal movement and prevent cracking that would otherwise allow water to penetrate. Silicone colour should be matched to grout colour for a consistent finish.
💡 Quick tip: Natural stone tiles (marble, travertine, limestone) need to be sealed after installation and periodically thereafter. Unsealed natural stone in a wet area absorbs water and staining products rapidly. Ask your tiler what sealer they’ve used and what the resealing schedule looks like for your specific stone.
Tiling is done. The bathroom suddenly looks like a bathroom. But there’s still a lot to do — all the plumbing and electrical that was roughed in now needs to be connected, and all the fixtures and fittings need to go in.
Stage 7 — Fit-Out: Bringing the Bathroom to Life with Fixtures, Fittings and Finishes
The fit-out stage is the most visually dramatic phase of the bathroom renovation — the one where it goes from a tiled shell to a room you can actually use. It involves multiple trades returning to site in a specific sequence: plumber first for fixture connections, electrician for final fitting, then the bathroom installer for vanity and accessories, and finally the glazier for shower screens. The sequence matters because each trade’s work provides the attachment point or service connection for the next.
Plumbing Connections and Fixture Installation
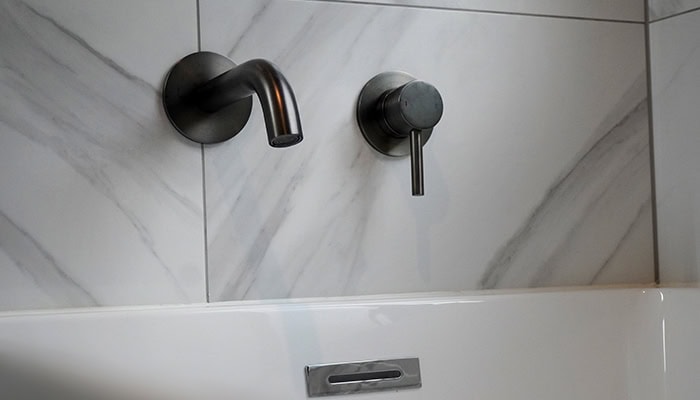
The plumber returns to connect all the fixtures that were positioned during rough-in: toilet suite, basin/vanity, shower mixer and rail, bath (if applicable), heated towel rail if it’s a hot-water type, and the waste connections for each. At this stage, the plumber also installs the shower waste (matching the drain cover to the floor tile or selecting a linear drain if that’s what was specified).
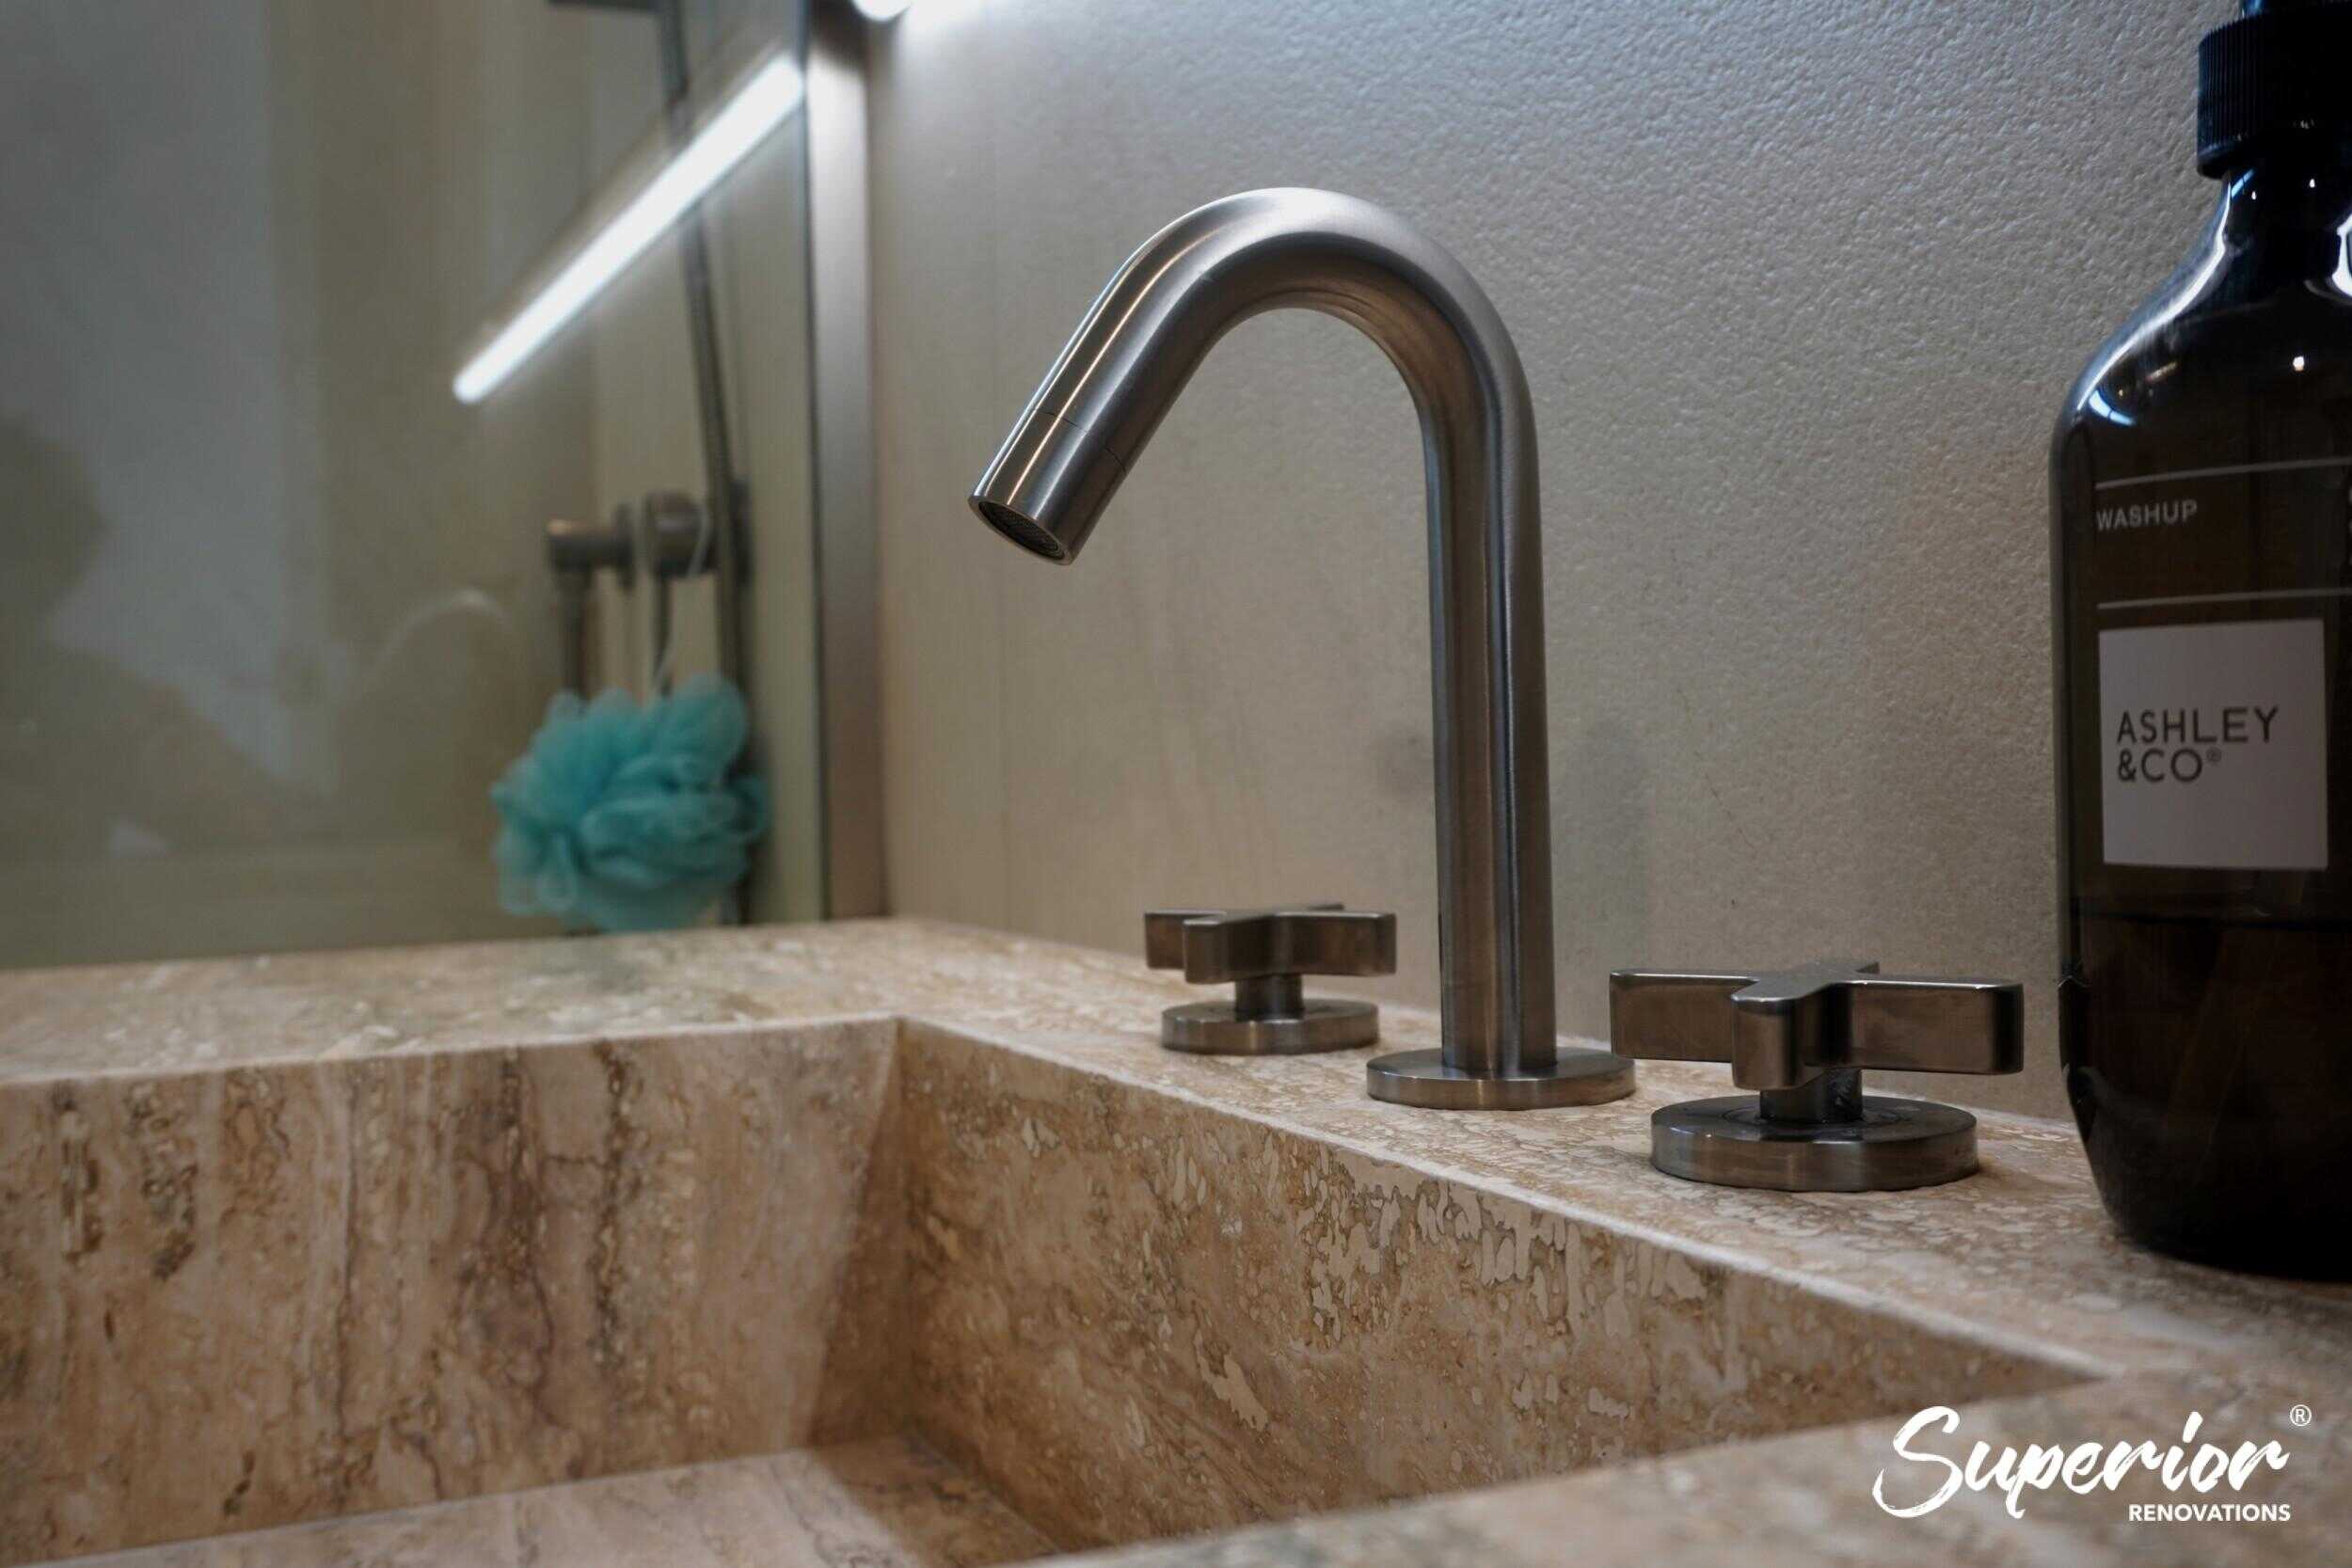
This is also when the tapware from suppliers like Reece goes in — shower heads, hand showers, basin mixers, bath fillers. The quality of your tapware choice becomes very tangible at this point. There’s a perceptible difference between a well-weighted, ceramic disc mixer and a budget unit, both in how it feels to operate and how long it lasts. The plumber will test all connections for water tightness before finishing.
Electrical Fit-Out
The electrician returns to fit off all the pre-roughed electrical: installing light fittings, exhaust fan, heated towel rail (if electric), shaver socket, mirror LED connections, and the thermostat and controller for underfloor heating. Bathroom lighting is one of the most underinvested aspects of a typical renovation — and one of the highest-impact ones. A well-lit bathroom with properly specified task lighting at the vanity, ambient overhead, and dimmer control makes the space feel significantly more luxurious than a single overhead downlight.
The electrician produces an Electrical Certificate of Compliance (CoC) upon completion — this is a legal requirement and forms part of your handover documentation. If you don’t receive one, the work is not legally signed off.

Vanity, Mirror and Accessory Installation
Wall-hung vanities go on after tiling — the timber blocking installed during the framing stage is now put to use, providing solid fixing points within the tiled wall. A wall-hung vanity incorrectly fixed to gib alone will eventually fail — the blocking is not optional. Freestanding vanities simply sit on the tiled floor but still need accurate positioning against wall tiles.
Mirrors, towel bars, toilet roll holders, and robe hooks are installed at this stage using appropriate fixings for the tile type (ceramic vs. porcelain requires different drill bits and fixing systems). LED-backlit mirrors — popular in contemporary Auckland bathrooms — need to be connected to the pre-roughed mirror supply circuit.
Shower Screen and Bath Screen Installation
Shower screens and shower doors are typically installed by a specialist glazier, not the bathroom installer. The glazier measures the finished, tiled shower enclosure on site, then manufactures the glass panel(s) to the exact dimensions. This means shower screen installation usually happens 5–10 working days after tiling is complete — the lead time for custom glass fabrication is the variable. Semi-frameless and frameless shower screens are the current preference in Auckland renovations; aluminium framed screens are largely considered dated.
With the fit-out stage complete, your bathroom is functionally operational. But it’s not quite finished — there are a few final trades and touches before the project manager calls for the final walk-through.
Stage 8 — Painting, Final Checks and Handover: The Last 10% That Makes 100% of the Impression
The final stage of a bathroom renovation is where the accumulated quality of every previous stage shows itself — or doesn’t. A beautifully tiled bathroom with a rushed paint job and incomplete grouting looks unfinished. A modest bathroom with immaculate paint lines, perfect sealant joints, and clean fittings looks like a quality renovation. The last 10% of the job deserves the same attention as the first 90%.
Painting
Bathroom painting is a specialist task — not because applying paint is hard, but because bathrooms require specific product selection and preparation to perform in a high-humidity environment. All bathroom paint must be appropriate for wet areas — semi-gloss or gloss formulations with mould-resistant additives are standard. Flat paint in a bathroom is a recipe for mould and peeling within a few years, regardless of how well ventilated the bathroom is.
Surface preparation matters enormously: primer on new gib, careful masking around tiles and fittings, and sanding between coats for a smooth, durable finish. The ceiling — often painted the same colour as the walls in a bathroom — should be a specific bathroom ceiling paint with anti-mould properties.
Final Plumbing and Electrical Checks
Before the final walk-through, the plumber and electrician conduct a final inspection of their own work — checking for any drips, confirming fixture operation, testing the underfloor heating thermostat, and verifying the exhaust fan is working at the correct extraction rate. NZ Building Code Clause G4 Ventilation requires that bathrooms have sufficient ventilation — either natural (window opening area) or mechanical (exhaust fan). A mechanical fan must achieve a minimum of 25 litres per second extraction capacity per building.govt.nz standards for residential bathrooms. This is a frequently overlooked detail that has a significant impact on mould and moisture management in Auckland’s humid climate.
The Final Walk-Through
The final walk-through is the most important meeting of the entire project. Your project manager walks you through every element of the finished bathroom — checking tile alignment, grout consistency, silicone joints, fixture operation, paint finish, door and screen operation, and anything else on the punch-list. This is your opportunity to flag anything that doesn’t meet the standard — and a quality renovation company wants to hear it.
Punch-list items (minor defects or incomplete items identified at the walk-through) are completed before the project is formally signed off. You don’t sign off until you’re satisfied. Full stop.
Handover Documentation
At handover, you receive your complete documentation pack. For a Superior Renovations project, this includes: workmanship warranty (1 year on labour), PS3 waterproofing certificate, Electrical Certificate of Compliance, Gas Fitting Certificate (where applicable), product warranties for all supplied fixtures and fittings, and an aftercare and maintenance guide. If your project required building consent, the project manager also coordinates the Code Compliance Certificate (CCC) application with Auckland Council.
💡 Quick tip: Keep your handover documentation in a safe place — both physical and digital copies. When you sell your home, these documents are assets. Buyers and their solicitors increasingly request renovation documentation, and a PS3, CoC, and CCC add tangible value and confidence to your transaction.
How Much Does a Full Bathroom Renovation Cost in Auckland in 2026?
With all eight stages in mind, here’s what a complete bathroom renovation in Auckland looks like in terms of cost in 2026:
| Renovation Tier | Typical Scope | Auckland Cost Range (2026) |
|---|---|---|
| Budget Refresh | New paint, fittings, minor tiling updates. No layout changes. | $9,000–$16,000 |
| Mid-Range Full Renovation | Full reno incl. all trades, waterproofing, new tiles, vanity, fixtures, lighting. Same layout. | $26,000–$35,000 |
| Full Overhaul / Luxury | Layout changes, premium fixtures, custom vanity, wet room, high-end tiles, full consent. | $40,000–$60,000+ |
| Labour Rate (tradies) | Plumbers, electricians, tilers — Auckland market rate | $90–$120/hour |
For a personalised estimate based on your specific bathroom and scope, use our free Bathroom Renovation Cost Calculator or read our full Auckland bathroom renovation cost guide for 2026.
How Long Does a Bathroom Renovation Take?
A standard full bathroom renovation takes 3–4 weeks from demolition day, assuming design is finalised and all materials are on site before work begins. Add 4–8 weeks prior to that if Auckland Council building consent is required. The total project duration from first consultation to handover — including design, consent (if needed), material lead times, and construction — is typically 8–16 weeks for a standard mid-range renovation.
One final thing: we do an aftercare follow-up one month after every renovation. Not because something will necessarily have gone wrong, but because we want to make sure everything is performing exactly as it should — and because we genuinely care about what happens after we hand the keys back.
Ready to get your bathroom renovation started? Here’s how to take the next step.
➡ Book your free in-home consultation with Superior Renovations
➡ Get an instant estimate with our Bathroom Renovation Cost Calculator
➡ Request a free feasibility report for your project
What are the stages of a bathroom renovation in Auckland?
A full Auckland bathroom renovation has 8 key stages: (1) Design and material selection, (2) Consents and compliance, (3) Demolition, (4) Plumbing, electrical, and framing rough-in, (5) Waterproofing, (6) Tiling, (7) Fit-out of fixtures and fittings, and (8) Painting, final checks, and handover. Total on-site time is typically 3–4 weeks from demolition, assuming design is locked and materials are pre-ordered.
How long does a bathroom renovation take in New Zealand?
A standard full bathroom renovation takes 3–4 weeks from the day demolition begins, assuming design is finalised and all materials have been delivered to site beforehand. If Auckland Council building consent is required (for example, if plumbing is being relocated), add 4–8 weeks for consent processing. Total project time from first consultation to handover is typically 8–16 weeks including design, consent, and construction.
Do I need building consent for a bathroom renovation in Auckland?
Most like-for-like bathroom renovations in Auckland — replacing fixtures in the same position, retiling, and updating vanities — are exempt from building consent under Schedule 1 of the NZ Building Act. You will need consent if you are moving plumbing to a new location, removing or modifying structural walls, changing window sizes, or converting a non-wet area into a wet room. Always confirm consent requirements with your renovation company before work begins.
What is a PS3 waterproofing certificate and do I need one?
A PS3 is a Producer Statement issued by a certified waterproofing specialist registered with the Plumbers, Gasfitters and Drainlayers Board. It certifies that the bathroom's waterproofing system complies with NZ Building Code Clause E3 Internal Moisture. You should always receive a PS3 at the end of a bathroom renovation — if your renovation company can't provide one, that is a significant red flag about the quality of the waterproofing installation.
How much does a full bathroom renovation cost in Auckland in 2026?
In Auckland in 2026, a mid-range full bathroom renovation costs $26,000–$35,000, covering design, waterproofing, all trades, tiles, fixtures, and project management. A budget refresh (paint, fittings, minor tiling) starts from $9,000–$16,000. A luxury renovation with layout changes, premium fixtures, and custom finishes starts from $40,000 and can reach $60,000+. Tradie labour rates in Auckland are $90–$120 per hour.
What trade sequence is used in a bathroom renovation?
The correct trade sequence in a bathroom renovation is: (1) Demolition, (2) Builder/plumber rough-in and framing, (3) Electrical rough-in, (4) Stopping and substrate preparation, (5) Waterproofing, (6) Tiling, (7) Plumbing fit-off and fixture installation, (8) Electrical fit-off and lighting, (9) Vanity, accessories and glazing installation, (10) Painting, and (11) Final checks and handover. Each trade's work depends on the previous stage being complete and properly inspected.
What does waterproofing in a bathroom involve?
Bathroom waterproofing involves applying a continuous, flexible membrane to all wet and potentially wet surfaces — shower walls and floor, bath surrounds, and the bathroom floor. In New Zealand, it must comply with Building Code Clause E3 Internal Moisture. The membrane must cure fully before tiling begins. A PS3 certificate must be issued by a registered waterproofing specialist. If consent is required, Auckland Council conducts a pre-tile inspection to verify the waterproofing before tiling proceeds.
What happens during bathroom demolition?
Bathroom demolition typically takes 1–2 days for a standard bathroom. The team removes all existing fixtures, strips tiles from walls and floor, removes gib board to expose framing, and strips the existing waterproofing membrane. The project manager then inspects framing, subfloor, and pipework for any hidden damage. In Auckland homes built before 1990, asbestos testing may be required before demolition can proceed. Any discovered issues (rotted framing, absent waterproofing) are quoted as variations before work continues.
Should I stay in my house during a bathroom renovation?
Most Auckland homeowners stay in their homes during a bathroom renovation, particularly if there is a second bathroom or ensuite available. Demolition is the noisiest and dustiest phase (typically 1–2 days). After that, work is messy but manageable. Your project manager will give you notice of the days with the most disruption. For single-bathroom homes, it's worth planning short-term alternative arrangements for the 3–4 week construction period, or discussing a phased schedule with your project manager.
Can I make changes to the design during the bathroom renovation?
Yes, but be aware that changes after work has commenced are treated as variations to the contract and incur additional cost for both labour and materials. Changes to waterproofed areas are the most disruptive and expensive because they require stripping tiles and membrane and starting the affected area again. The best time to make decisions is during the design stage — after contract signing, changes become progressively more expensive the further into the build you are.
What documents should I receive at bathroom renovation handover?
At handover, you should receive: a workmanship warranty covering all labour, a PS3 waterproofing certificate, an Electrical Certificate of Compliance, a Gas Fitting Certificate (if gas work was done), product warranties for all supplied fixtures, and an aftercare and maintenance guide. If your project required building consent, the renovation company should also coordinate the Code Compliance Certificate (CCC) application with Auckland Council on your behalf.
Further Resources for your bathroom renovation
- Featured projects and Client stories to see specifications on some of the projects.
- Real client stories from Auckland
Need more information?
Take advantage of our FREE Complete Home Renovation Guide (48 pages), whether you’re already renovating or in the process of deciding to renovate, it’s not an easy process, this guide which includes a free 100+ point check list – will help you avoid costly mistakes.
Download Free Renovation Guide (PDF)
Still have questions unanswered?
Book a no-obligation consultation with the team at Superior Renovations,
we’d love to meet you to discuss your renovation ideas!
[contact-form-7]
Or call us on 0800 199 888

Have you been putting off getting renovations done?
We have partnered with Q Mastercard ® to provide you an 18 Month Interest-Free Payment Option, you can enjoy your new home now and stress less.
Learn More about Interest-Free Payment Options*
*Lending criteria, fees, terms and conditions apply. Mastercard is a registered trademark and the circles design is a trademark of Mastercard International Incorporated.
The post What Are the Stages of a Bathroom Renovation? Auckland Guide appeared first on Superior Renovations. #superiorrenovations


Comments
Post a Comment