Acrylic Shower vs Tiled Shower NZ — Honest Comparison
Originally posted on Acrylic Shower vs Tiled Shower NZ — Honest Comparison
Superior Renovations - Auckland’s Trusted Home Renovation Specialists
Quick answer: A standard acrylic shower in Auckland costs $900–$2,000 installed and takes half a day. A tiled shower runs $2,500–$4,000, takes considerably longer, and usually requires a building consent — but it lasts two to three times as long and adds genuine value to your bathroom.
We hear this question at nearly every bathroom consultation. The client has done some browsing, they’ve seen the supplier websites, and they want a straight answer: acrylic or tiled?
Here’s the thing most of those supplier articles won’t tell you — they’re written by companies that sell one or the other. Newline makes acrylic showers. Englefield makes acrylic showers. Crest Showers sells glass and tile packages. Each one is going to nudge you toward their product. That’s not a criticism — it’s just how it works.
We’re a renovation company. We install acrylic showers and tiled showers across Auckland every week. We don’t manufacture either. We don’t get a better margin on one versus the other. So when a client in Remuera asks us what they should put in their ensuite, or a landlord in Henderson asks what makes sense for a rental refresh, we give them the honest answer based on their specific situation.
This post is that honest answer, written for Auckland homeowners. We’ll cover exactly what each option costs, what’s involved in the installation, whether you need a building consent (this one trips people up constantly), how long each lasts, and — at the end — what we actually recommend based on eight years of doing this.
What Does an Acrylic Shower Actually Cost vs a Tiled Shower in Auckland?
Let’s get the numbers on the table first, because this is usually what decides it.
An acrylic shower package — base, wall liner, glass, and waste — costs between $900 and $2,000 fully installed in Auckland. That’s the complete job. The lower end gets you a standard 900×900mm two-sided Newline or Englefield unit with framed glass. The upper end gets you a larger 1200×900mm unit with semi-frameless or frameless glass and a low-profile tray.
A tiled shower is a different proposition entirely. Expect to pay $2,500–$4,000 for a tiled shower as part of a bathroom renovation in Auckland — and that’s when you’re already renovating the room. The tiling labour, waterproof membrane, GIB Aqualine lining, tile supply, grout, and shower glass all add up. If you’re tiling the entire bathroom floor-to-ceiling (which most of our clients do when they go the tiled route), the shower becomes part of a larger tiling package rather than a standalone cost.
 Full Cost Breakdown — Acrylic vs Tiled Shower NZ
| Cost Component | Acrylic Shower | Tiled Shower |
|---|---|---|
| Shower base/tray | $200–$500 (included in package) | $300–$800 (tile-over tray or built on site) |
| Walls | $250–$600 (acrylic liner) | $500–$1,500 (tiles + waterproof membrane + GIB Aqualine) |
| Shower glass | $300–$800 (framed to semi-frameless) | $800–$2,500 (frameless custom-cut) |
| Installation labour | $300–$600 (4–6 hours) | $1,000–$2,000 (multiple trades, multiple days) |
| Building consent | Not typically required (like-for-like) | $500–$2,500 (usually required) |
| Total installed cost | $900–$2,000 | $2,500–$4,000+ |
A few things to note. Those tiled shower figures assume you’re already doing a full bathroom renovation and the tiler is on site anyway. If you wanted to rip out a standalone acrylic unit and replace it with a tiled shower on its own — without renovating the rest of the bathroom — you’d be looking at $7,000–$10,000 or more once you add consent, waterproofing, tiling, plumbing, and glass. That’s a figure Refresh Renovations and Newline both reference, and it matches what we see.
💡 Quick tip: If you’re renovating the whole bathroom anyway, the cost gap between acrylic and tiled shrinks considerably — because the tiler, waterproofer, and plasterer are already booked. The real cost difference is when you’re replacing a shower in isolation.
One more number worth knowing. Auckland labour rates for bathroom work run $90–$120 per hour across trades. Tiling labour is on the higher end of that range, and a skilled tiler working on shower walls and a shower floor will spend 2–3 days minimum. That labour cost is baked into the tiled shower figures above.

Superior Renovations
Building Consent — The Part Most People Get Wrong
This is where the acrylic vs tiled shower conversation gets genuinely complicated in New Zealand. And it’s the section most supplier websites either skip entirely or oversimplify.
If you’re replacing an acrylic shower with another acrylic shower in the same position, you generally don’t need a building consent. It’s a like-for-like replacement. The plumbing stays where it is, no structural changes, no waterproof membrane work. A plumber swaps the waste, the installer fits the new unit, and you’re done in a day.
Tiled showers? Different story.
Why Tiled Showers Usually Need Consent in NZ
MBIE’s published guidance states that installing a tiled wet area shower will require a building consent. The reasoning: tiled showers involve waterproof membrane installation, which MBIE considers critical building work beyond standard sanitary plumbing. That work sits outside the exemptions listed in Schedule 1 of the Building Act 2004 — at least according to the Ministry’s official position.
Auckland Council follows this guidance. Their website is clear: if it’s a tiled wet area shower, expect to apply for consent.
But — and this is the part that’s been confusing tradies and homeowners across the country — a 2024 MBIE determination (2024/054) muddied the water. That determination found that removing existing linings and installing new ones, including wet area membranes, fell within the scope of Clause 12 of Schedule 1. In plain English: in some circumstances, the membrane work that MBIE’s own website says requires consent was found to be exempt under the Act itself.
“We always advise clients to get consent for a tiled shower. The cost is $500–$2,500 and it protects you when you sell. The determination created some grey area, but grey area in building compliance isn’t something you want to gamble on — especially in Auckland where LIM reports flag everything.”
— Dorothy Li, Design Manager, Superior Renovations
Our position is straightforward. Get the consent. It’s a few hundred dollars and a few weeks of processing time. When you sell your home, a consented tiled shower is an asset. An unconsented one is a negotiation point — and not in your favour. We’ve seen Auckland property transactions where the buyer’s solicitor knocked $5,000–$10,000 off the purchase price because bathroom work wasn’t consented. That makes the $500–$2,500 consent fee look like very cheap insurance.
💡 Quick tip: If a tradie tells you a tiled shower doesn’t need consent, ask them to put that in writing. Most won’t — because they know the liability sits with the homeowner, not the installer. Use MBIE’s online exempt work tool or call Auckland Council’s building desk directly.
What This Means in Practice
For most Auckland homeowners doing a full bathroom renovation with a tiled shower, the consent is part of the process anyway. Superior Renovations handles all consent applications on behalf of our clients — it’s built into how we manage projects. You won’t be chasing council inspectors or trying to interpret Schedule 1 yourself. We work with Sonder Architecture for any projects that require architectural drawings or resource consent documentation.
For landlords doing a quick rental refresh with an acrylic swap? The consent question rarely comes up. That’s one of acrylic’s genuine advantages.

How Long Does Each Shower Type Actually Last?
This is where the value equation shifts — and where acrylic’s upfront cost advantage starts to shrink.
A quality acrylic shower lasts 10–20 years. That’s the range from NZ suppliers like Newline and Englefield. The walls hold up well — acrylic is non-porous, doesn’t absorb moisture, and resists mould naturally. The tray is usually the first thing to show wear. Newline rates their standard acrylic trays for 10 years under normal use. Higher-end units with thicker acrylic and reinforced bases push toward 15–20 years.
A tiled shower? Properly installed with quality porcelain or ceramic tiles, expect 40–50 years. The tiles themselves are almost indestructible. What needs attention is the grout and the waterproof membrane underneath. Grout should be resealed every 8–10 years, and silicone around glass and junctions needs replacing every 2–3 years (or sooner in Auckland’s humidity). That maintenance isn’t free — a professional silicone replacement and grout reseal runs $300–$600 — but it’s a fraction of a full shower replacement.
Maintenance Comparison
| Maintenance Task | Acrylic Shower | Tiled Shower |
|---|---|---|
| Weekly cleaning | Wipe with soft cloth + mild soap — 5 mins | Clean tiles + scrub grout lines — 10–15 mins |
| Silicone replacement | Every 3–5 years | Every 2–3 years |
| Grout resealing | N/A — no grout | Every 8–10 years ($300–$600) |
| Damage repair | Difficult — cracks often mean full replacement | Individual tiles can be replaced without redoing the whole shower |
| Expected lifespan | 10–20 years | 40–50 years (with grout maintenance) |
Here’s the maths that matters. Over a 40-year period in your Auckland home, you’d likely replace an acrylic shower two to three times — spending $2,700–$6,000 total. A single tiled shower installation at $3,500 with two grout reseals ($600–$1,200) totals around $4,200–$4,700 over the same period. Similar lifetime cost, but the tiled shower adds more to your home’s market value throughout.
💡 Quick tip: Auckland’s humidity (averaging 70–80% annually) is harder on both options than you’d expect. For acrylic, make sure your extractor fan is rated for the room size — inadequate ventilation accelerates yellowing. For tiled showers, use porcelain tiles over ceramic where budget allows — porcelain’s water absorption rate is under 0.5%, making it far more suitable for Auckland’s damp conditions.
“I always tell clients — the grout is not the enemy. Poor ventilation is the enemy. We see tiled showers in Ponsonby villas that look brand new after 12 years because the extractor fan is doing its job. And we see acrylic showers in new builds that have yellowed in five years because the bathroom has no window and a cheap fan.”
— Cici Zou, Designer (NZ Dip. Interior Design, Certified Designer), Superior Renovations
Design and Aesthetics — When Each Option Makes Sense
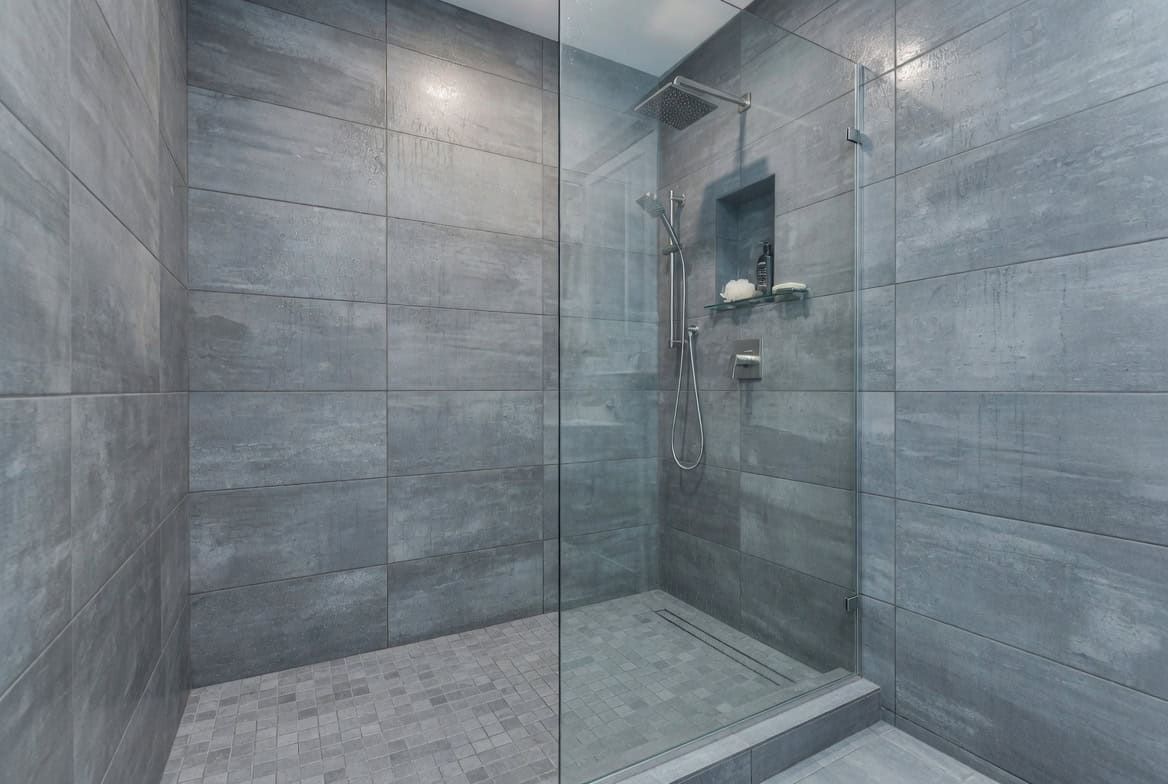
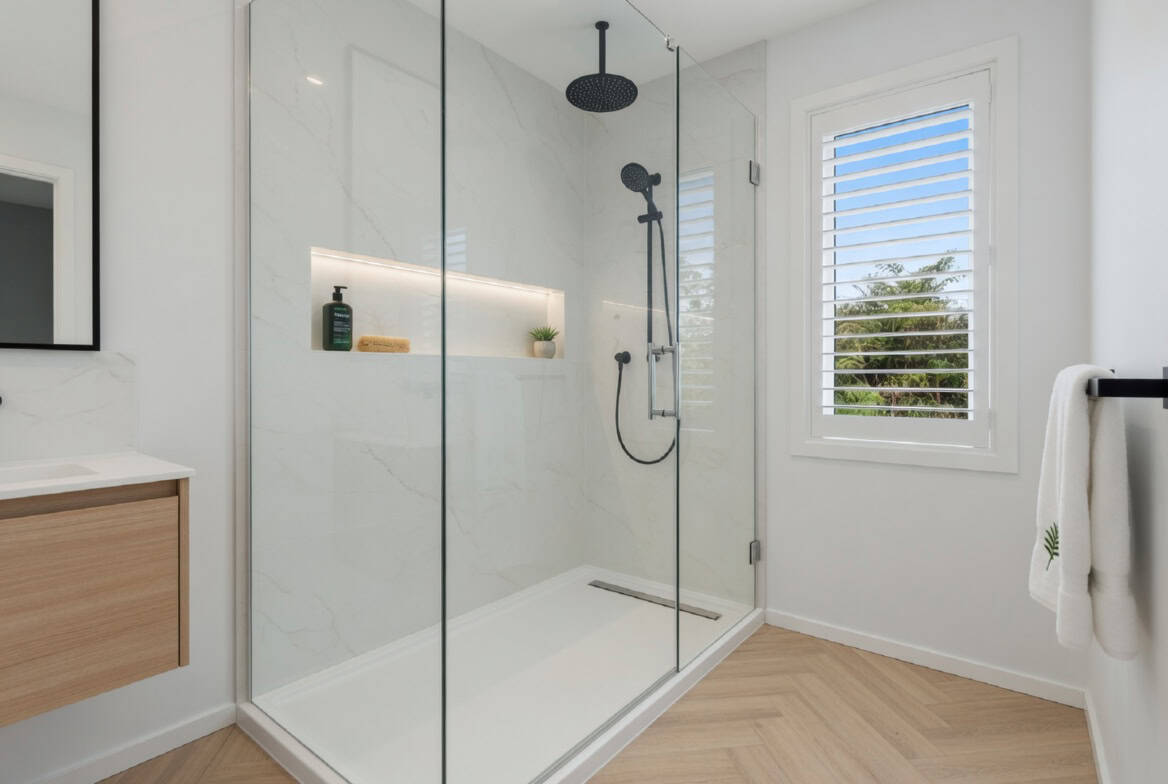
Let’s be direct about this. A tiled shower looks better. That’s not a controversial statement — it’s why the majority of our Auckland bathroom renovation clients choose tiled. When you tile a shower floor-to-ceiling using the same tiles as the rest of the bathroom, you create visual continuity that makes the whole room feel larger and more cohesive. An acrylic box sitting inside a tiled bathroom does the opposite — it breaks the visual flow and immediately reads as a separate, lower-spec element.
That said, acrylic has come a long way. It’s not just the white plastic boxes people remember from the ’90s.
What Acrylic Can and Can’t Do
Modern acrylic showers from NZ brands like Englefield and Newline now offer low-profile trays, near-frameless glass, and cleaner wall profiles. Some manufacturers produce tile-look acrylic liners — Atlantis sells their Ellure range specifically to mimic a tiled wall without the waterproofing and consent requirements.
But there are hard limits. Acrylic is only available in white (coloured options exist but are made to order and significantly more expensive). You’re locked into the sizes the manufacturer offers — usually 900×900mm, 1000×1000mm, or 1200×900mm. If your bathroom has an awkward alcove or a non-standard dimension (common in older Auckland villas and bungalows), acrylic may not fit without compromising the layout.
What Tiled Showers Offer That Acrylic Can’t
Full design freedom. Any tile, any colour, any pattern, any size. You can run the same large-format 600×600mm porcelain across the bathroom floor and straight into the shower. You can create feature walls with textured or patterned tiles. You can build the shower to any dimension — wall-to-wall, oversized, or shaped to fill dead space in an unusual floor plan.
We recently completed a bathroom in Grey Lynn where the homeowner wanted a double-width walk-in shower spanning the full back wall of the room — 2.4 metres wide with a single glass panel. That’s not something an acrylic unit can do. The tiled shower with large-format charcoal porcelain and a linear channel drain made the bathroom look twice its actual size.

For clients working with our design studio, the tiled shower becomes a design element — not just a functional box. Our designers source tiles from The Tile Depot and work with fixtures from Reece to create bathrooms where the shower is the centrepiece, not an afterthought.

💡 Quick tip: If you’re renovating a bathroom in a character home — an early 1900s villa in Mt Eden, a 1930s bungalow in Epsom — a tiled shower with artisan or handmade-look tiles will complement the home’s character far better than a white acrylic unit. Continuity between the shower and the rest of the bathroom is what separates a good renovation from a great one.
So Which Should You Choose? Our Honest Recommendation
After installing hundreds of both across Auckland, here’s where we land.
Choose Acrylic If:
You’re renovating a rental property. The maths are simple. An acrylic shower at $1,200 installed, lasting 10–15 years with almost zero maintenance, is the right call for a rental. Your tenants won’t appreciate (or maintain) expensive tilework, and you don’t need the design premium. We’ve done plenty of rental bathroom refreshes across Henderson, Papakura, and South Auckland where an acrylic unit with a basic vanity and new flooring brings the bathroom up to a good standard for under $6,000 total.
You’re on a very tight budget. If you’re spending under $15,000 on a full bathroom renovation and every dollar matters, acrylic saves you $1,500–$3,000 on the shower alone — money you can redirect to a better vanity, decent tapware, or underfloor heating.
You need it done fast. Moving in next week? Selling in a month? Acrylic goes in within a day. No consent, no waiting for a tiler, no curing time.
Choose a Tiled Shower If:
You’re renovating your own home. If this is the bathroom you’ll use for the next 10–20 years, spend the extra. The tiled shower will outlast the acrylic option by decades, and you’ll appreciate the design every morning. It’s not about luxury — it’s about doing it once and doing it properly.
You’re spending $25,000+ on the bathroom renovation. At this budget level, putting an acrylic shower in a fully tiled bathroom looks and feels wrong. It’s the equivalent of fitting laminate benchtops in a kitchen with custom cabinetry. The shower should match the standard of the rest of the room. A mid-range bathroom renovation in Auckland runs $25,000–$35,000 — and at that price point, the tiled shower is already factored in.
You’re trying to add value before selling. A tiled, consented bathroom reads as a quality renovation on a property listing. An acrylic shower in an otherwise upgraded bathroom sends mixed signals. Buyers notice.
“When clients come to our showroom at 16B Link Drive in Wairau Valley, we always show them both options side by side. Nine times out of ten, once they see the difference in person, they choose tiled. It’s not about cost at that point — it’s about how their bathroom will feel every day.”
— Alison Yu, Designer, Superior Renovations
The Hybrid Option
There’s a middle ground worth mentioning. Some homeowners choose an acrylic tray with tiled walls. The acrylic base handles the waterproofing at floor level (where leaks cause the most damage), while the tiled walls give you the design flexibility and premium look. It can work — but talk to your renovation company about how the junction between tray and tile is detailed, because that’s where problems occur if it’s not done properly. It’s not a shortcut we recommend for most clients, but it has its place.

What Happens During Installation — Acrylic vs Tiled
Understanding what’s actually involved helps explain the cost and time difference.
Acrylic Shower Installation
Total time: 4–6 hours, one tradie. The process is straightforward. The plumber connects the waste fitting to the shower tray, the tray is set onto the floor (levelled with packing if needed), the acrylic wall liners are glued to the walls, silicone is applied at all junctions, and the glass is fitted. Done.
The simplicity is acrylic’s biggest practical advantage. One person, one day, minimal disruption. If you’re replacing an existing acrylic unit with a new one and the plumbing is in the same position, there’s very little that can go wrong.
Tiled Shower Installation
Total time: 5–10 working days (as part of a full bathroom renovation), involving multiple trades. Here’s the typical sequence:
Day 1–2: Demolition of existing shower, wall preparation, any structural modifications to floor joists or framing. Day 3: GIB Aqualine (or equivalent wet-area lining) installed on walls. Shower tray positioned and waste connected by plumber. Day 4: Waterproof membrane applied to all wet-area surfaces — walls and floor. This is the critical step. The membrane needs to cure for 24–48 hours minimum before tiling. Day 5–7: Tiling — walls first, then floor. Larger tiles reduce labour time, which is why 600×600mm formats have become standard in Auckland bathrooms. Day 8: Grouting and initial clean. Day 9–10: Silicone applied at all junctions, glass measured and fitted (custom glass may require a separate visit).
The waterproof membrane is what makes or breaks a tiled shower. Get it wrong and you’re dealing with leaks that damage framing, flooring, and potentially rooms below. This is why MBIE cares about consent for tiled showers — and why you want a renovation company that uses licensed building practitioners, not a mate with a trowel. We use certified waterproofing systems and provide PS3 waterproofing certificates as standard on every tiled shower we install.
💡 Quick tip: Ask your renovation company for a PS3 producer statement for the waterproofing. This is a document signed by the waterproofing applicator confirming the membrane was installed to the manufacturer’s specifications. It’s required for consent sign-off and it’s your proof that the job was done correctly. If a company can’t or won’t provide one, that’s a red flag.
➡ Book your free in-home consultation with Superior Renovations
➡ Use our bathroom renovation cost calculator to estimate your project
➡ Request a free feasibility report for your project
How much does an acrylic shower cost in NZ?
A standard acrylic shower package — base, wall liner, glass, and waste — costs between $900 and $2,000 fully installed in Auckland. The price depends on the size (900×900mm to 1200×900mm), glass type (framed vs frameless), and brand. Popular NZ brands include Englefield, Newline, Atlantis, and Clearlite. Labour is typically 4–6 hours with one tradesperson.
How much does a tiled shower cost in Auckland?
A tiled shower costs $2,500–$4,000 when installed as part of a full bathroom renovation in Auckland. This includes the tile-over tray, waterproof membrane, GIB Aqualine lining, tiles, grouting, and glass. If you're replacing a standalone acrylic shower with a tiled shower without renovating the rest of the bathroom, expect $7,000–$10,000+ including building consent.
Do I need a building consent for a tiled shower in NZ?
In most cases, yes. MBIE's guidance states that installing a tiled wet area shower requires a building consent because it involves waterproof membrane installation — classified as critical building work. Auckland Council follows this guidance. A 2024 MBIE determination (2024/054) created some grey area around Clause 12 exemptions, but our strong advice is to get consent regardless. It costs $500–$2,500 and protects you when selling your home.
Do I need consent to replace an acrylic shower with another acrylic shower?
Generally no, provided it's a like-for-like replacement in the same position with no changes to plumbing layout or structure. An authorised plumber should handle the waste connection. This is one of acrylic's key advantages — a straightforward swap with no council involvement.
How long does an acrylic shower last in NZ?
A quality acrylic shower lasts 10–20 years depending on the brand and maintenance. NZ supplier Newline rates their standard trays for 10 years under normal use. Higher-end units with thicker acrylic push toward 15–20 years. Auckland's high humidity can accelerate wear if ventilation is poor — a decent extractor fan is essential.
How long does a tiled shower last?
A properly installed tiled shower with porcelain or ceramic tiles can last 40–50 years. The tiles themselves are extremely durable — it's the grout and waterproof membrane that determine overall lifespan. Grout should be resealed every 8–10 years, and silicone at junctions needs replacing every 2–3 years. With regular maintenance, a tiled shower will outlast multiple acrylic replacements.
Is an acrylic shower or tiled shower easier to clean?
Acrylic is easier for day-to-day cleaning. The smooth, non-porous surface wipes clean with a soft cloth and mild soap in about 5 minutes. Tiled showers require more effort — you need to clean between grout lines where soap scum and mould can build up, especially in Auckland's humid climate. Using larger tiles (fewer grout lines) and porcelain over ceramic reduces the cleaning burden significantly.
Can I replace an acrylic shower with a tiled shower myself?
We strongly advise against it. A tiled shower involves waterproof membrane application, wet-area lining (GIB Aqualine), correct fall for drainage, and tiling to building code standards. Errors in waterproofing can cause thousands of dollars in hidden water damage. The work typically requires a building consent with council inspections. Use a licensed renovation company that provides PS3 waterproofing certificates.
Which adds more value to my home — acrylic or tiled shower?
A tiled shower adds more value. When buyers inspect an Auckland property, a fully tiled, consented bathroom reads as a quality renovation. An acrylic shower in an otherwise well-renovated bathroom can signal cost-cutting. For owner-occupied homes and properties being prepared for sale, tiled is the better investment. For rentals where tenant-proof durability matters more than aesthetics, acrylic is the practical choice.
What is a PS3 waterproofing certificate and why does it matter?
A PS3 producer statement is a document signed by the waterproofing applicator confirming the membrane was installed according to the manufacturer's specifications. It's required for building consent sign-off on tiled showers in NZ and serves as your proof that the waterproofing was done correctly. Always ask your renovation company for this document — if they can't provide one, consider it a warning sign.
What tiles are best for a shower in Auckland?
Porcelain tiles are the best choice for Auckland showers. Their water absorption rate is under 0.5%, making them highly resistant to moisture damage — important given Auckland's 70–80% average humidity. Large-format tiles (600×600mm or larger) reduce grout lines and cleaning time. For the shower floor, use smaller mosaic tiles or textured porcelain for grip. Source options from suppliers like The Tile Depot (thetiledepot.co.nz) who carry a wide NZ range.
How long does it take to install a tiled shower vs acrylic?
An acrylic shower installs in 4–6 hours with one tradesperson. A tiled shower takes 5–10 working days as part of a full bathroom renovation — involving demolition, wall preparation, waterproofing membrane application (plus 24–48 hours curing time), tiling, grouting, and glass fitting. Multiple trades are needed: plumber, waterproofer, tiler, and glass installer.
Further Resources for your bathroom renovation
- Featured projects and Client stories to see specifications on some of the projects.
- Real client stories from Auckland
Need more information?
Take advantage of our FREE Complete Home Renovation Guide (48 pages), whether you’re already renovating or in the process of deciding to renovate, it’s not an easy process, this guide which includes a free 100+ point check list – will help you avoid costly mistakes.
Download Free Renovation Guide (PDF)
Still have questions unanswered?
Book a no-obligation consultation with the team at Superior Renovations,
we’d love to meet you to discuss your renovation ideas!
[contact-form-7]
Or call us on 0800 199 888

Have you been putting off getting renovations done?
We have partnered with Q Mastercard ® to provide you an 18 Month Interest-Free Payment Option, you can enjoy your new home now and stress less.
Learn More about Interest-Free Payment Options*
*Lending criteria, fees, terms and conditions apply. Mastercard is a registered trademark and the circles design is a trademark of Mastercard International Incorporated.
The post Acrylic Shower vs Tiled Shower NZ — Honest Comparison appeared first on Superior Renovations. #superiorrenovations


Comments
Post a Comment