Golden Rule for Bathroom Layouts in NZ (2026)
Originally posted on Golden Rule for Bathroom Layouts in NZ (2026)
Superior Renovations - Auckland’s Trusted Home Renovation Specialists
Quick answer: The golden rule for bathroom layouts is zoning — separating your bathroom into distinct wet and dry areas so every fixture has purpose, space, and proper clearance around it. Get zoning right and everything else — the flow, the safety, the daily comfort — falls into place.
Most Auckland homeowners start their bathroom reno by picking tiles. Or a vanity they spotted on Instagram. Or a freestanding bath that’ll look gorgeous against the wall in the ensuite.
None of that matters if the layout doesn’t work.
We’ve seen it enough times to know: a bathroom that looks right but flows wrong is a bathroom you’ll quietly resent for years. The toilet faces the door. The shower sprays water across the vanity. You can’t open a drawer without bumping into the towel rail. These aren’t bad product choices — they’re layout problems. And they all trace back to one thing.
The golden rule. Zoning.
It’s the principle every designer on our team applies before anything else gets decided — before materials, before colours, before fixtures. Divide the bathroom into wet and dry zones, maintain proper clearances between fixtures, and design the flow so you move naturally from dry to wet as you step further into the room. That’s it. Simple to say. Surprisingly easy to get wrong, especially in Auckland’s older homes where bathrooms were often squeezed into whatever space was left over.
In this piece, we’ll break down exactly what the golden rule means, how to apply it in bathrooms from 3m² powder rooms to 12m² master ensuites, the specific clearance dimensions that matter for NZ homes, and the layout mistakes we see most often across Auckland renovations. Whether you’re renovating a 1970s brick-and-tile in Henderson or a character villa in Grey Lynn, this is the foundation that makes everything else work.
What the Golden Rule Actually Means — Zoning Your Bathroom Into Wet and Dry Areas
The term “golden rule” gets thrown around loosely online, but among bathroom designers it refers to one core principle: organise every bathroom around clearly defined wet and dry zones.
The wet zone is where water flows — your shower, your bath, and the immediate splash area around them. The dry zone is everything else: the vanity, the toilet, storage, and the space you use for getting dressed, applying makeup, or brushing your teeth.
Why does this matter? Three reasons.
Safety and Moisture Control
Water on bathroom floors is the number one cause of slip injuries in New Zealand homes. When wet and dry zones aren’t properly separated, water migrates across the floor every time someone showers. In Auckland’s humid climate — where bathrooms already battle condensation through the wetter months — that’s a recipe for slippery tiles, swollen cabinetry, and mould behind the vanity that you won’t notice until it’s a real problem.
The NZ Building Code Clause E3 (Internal Moisture) requires that floor surfaces in any space containing sanitary fixtures must be impervious and easily cleaned. Proper zoning is how you meet that requirement in practice — not just on paper.
💡 Quick tip: Position the wet zone (shower, bath) at the back of the room, furthest from the door. This keeps water and steam contained rather than spreading across the entire bathroom every time you shower.
Flow and Daily Usability
Think about your morning routine. You walk in, use the toilet, wash your hands, check the mirror, maybe brush your teeth. The shower comes later — or sometimes not at all. For most of the time you spend in your bathroom, you’re in the dry zone. It makes sense to put that zone closest to the door, where it’s easiest to access.
When you enter a well-zoned bathroom, you should see the vanity or basin first. Not the toilet. Definitely not the back of the shower. This isn’t just about aesthetics — it’s about making the space feel intuitive. You don’t think about it when it works. You absolutely notice when it doesn’t.
“The first thing you should see when you open the bathroom door is either the vanity or the bath — never the toilet. That single decision sets the tone for the entire layout and affects how the room feels every single day.”
— Cici Zou, Designer (NZ Dip. Interior Design, Certified Designer), Superior Renovations
Fixture Clearances — The Numbers That Make It Work
Zoning isn’t only about which fixtures go where. It’s about how much space sits between them. Every fixture in a bathroom needs a minimum clearance zone around it — space to stand, move, and use it comfortably.
Here are the practical clearances that NZ bathroom designers work to:
| Fixture | Minimum Front Clearance | Recommended Front Clearance | Side Clearance |
|---|---|---|---|
| Toilet | 550 mm | 750 mm | 380 mm from centreline to wall/fixture |
| Vanity / Basin | 550 mm | 750 mm | 500 mm from centreline to wall |
| Shower entry | 600 mm | 750 mm | Minimum 900 × 900 mm internal |
| Freestanding bath | 600 mm entry side | 750 mm | 100–150 mm perimeter for cleaning |
| Door swing | Full arc must not hit any fixture | Outward swing or sliding preferred | — |
These clearances can overlap — the space in front of the toilet can also be the circulation path to the shower, for instance. But no fixture should feel boxed in. If you can’t comfortably stand, turn, and reach a towel after stepping out of the shower, the clearances are too tight.
For Auckland bathroom renovations where consent isn’t required (most like-for-like replacements), these clearances aren’t legally mandated by the NZ Building Code for existing residential bathrooms. But they’re best-practice design standards drawn from NZS 4121 and international guidelines — and they’re what separates a bathroom that works from one that merely fits.
How to Apply the Golden Rule in Auckland Bathrooms — From Tiny Ensuites to Master Bathrooms
Theory is one thing. Applying it inside a 2.4 × 1.8 metre ensuite in a 1990s townhouse in Albany? That’s where it gets real.
Auckland bathrooms come in wildly different shapes and sizes, and the golden rule has to flex to fit all of them. The principle stays the same — zone wet from dry, maintain clearances, control the flow. The execution changes depending on what you’re working with.
Small Bathrooms (3–5 m²) — Most Auckland Ensuites and Second Bathrooms
This is the size range we see most often. It’s where the golden rule matters most, because there’s no room for mistakes.
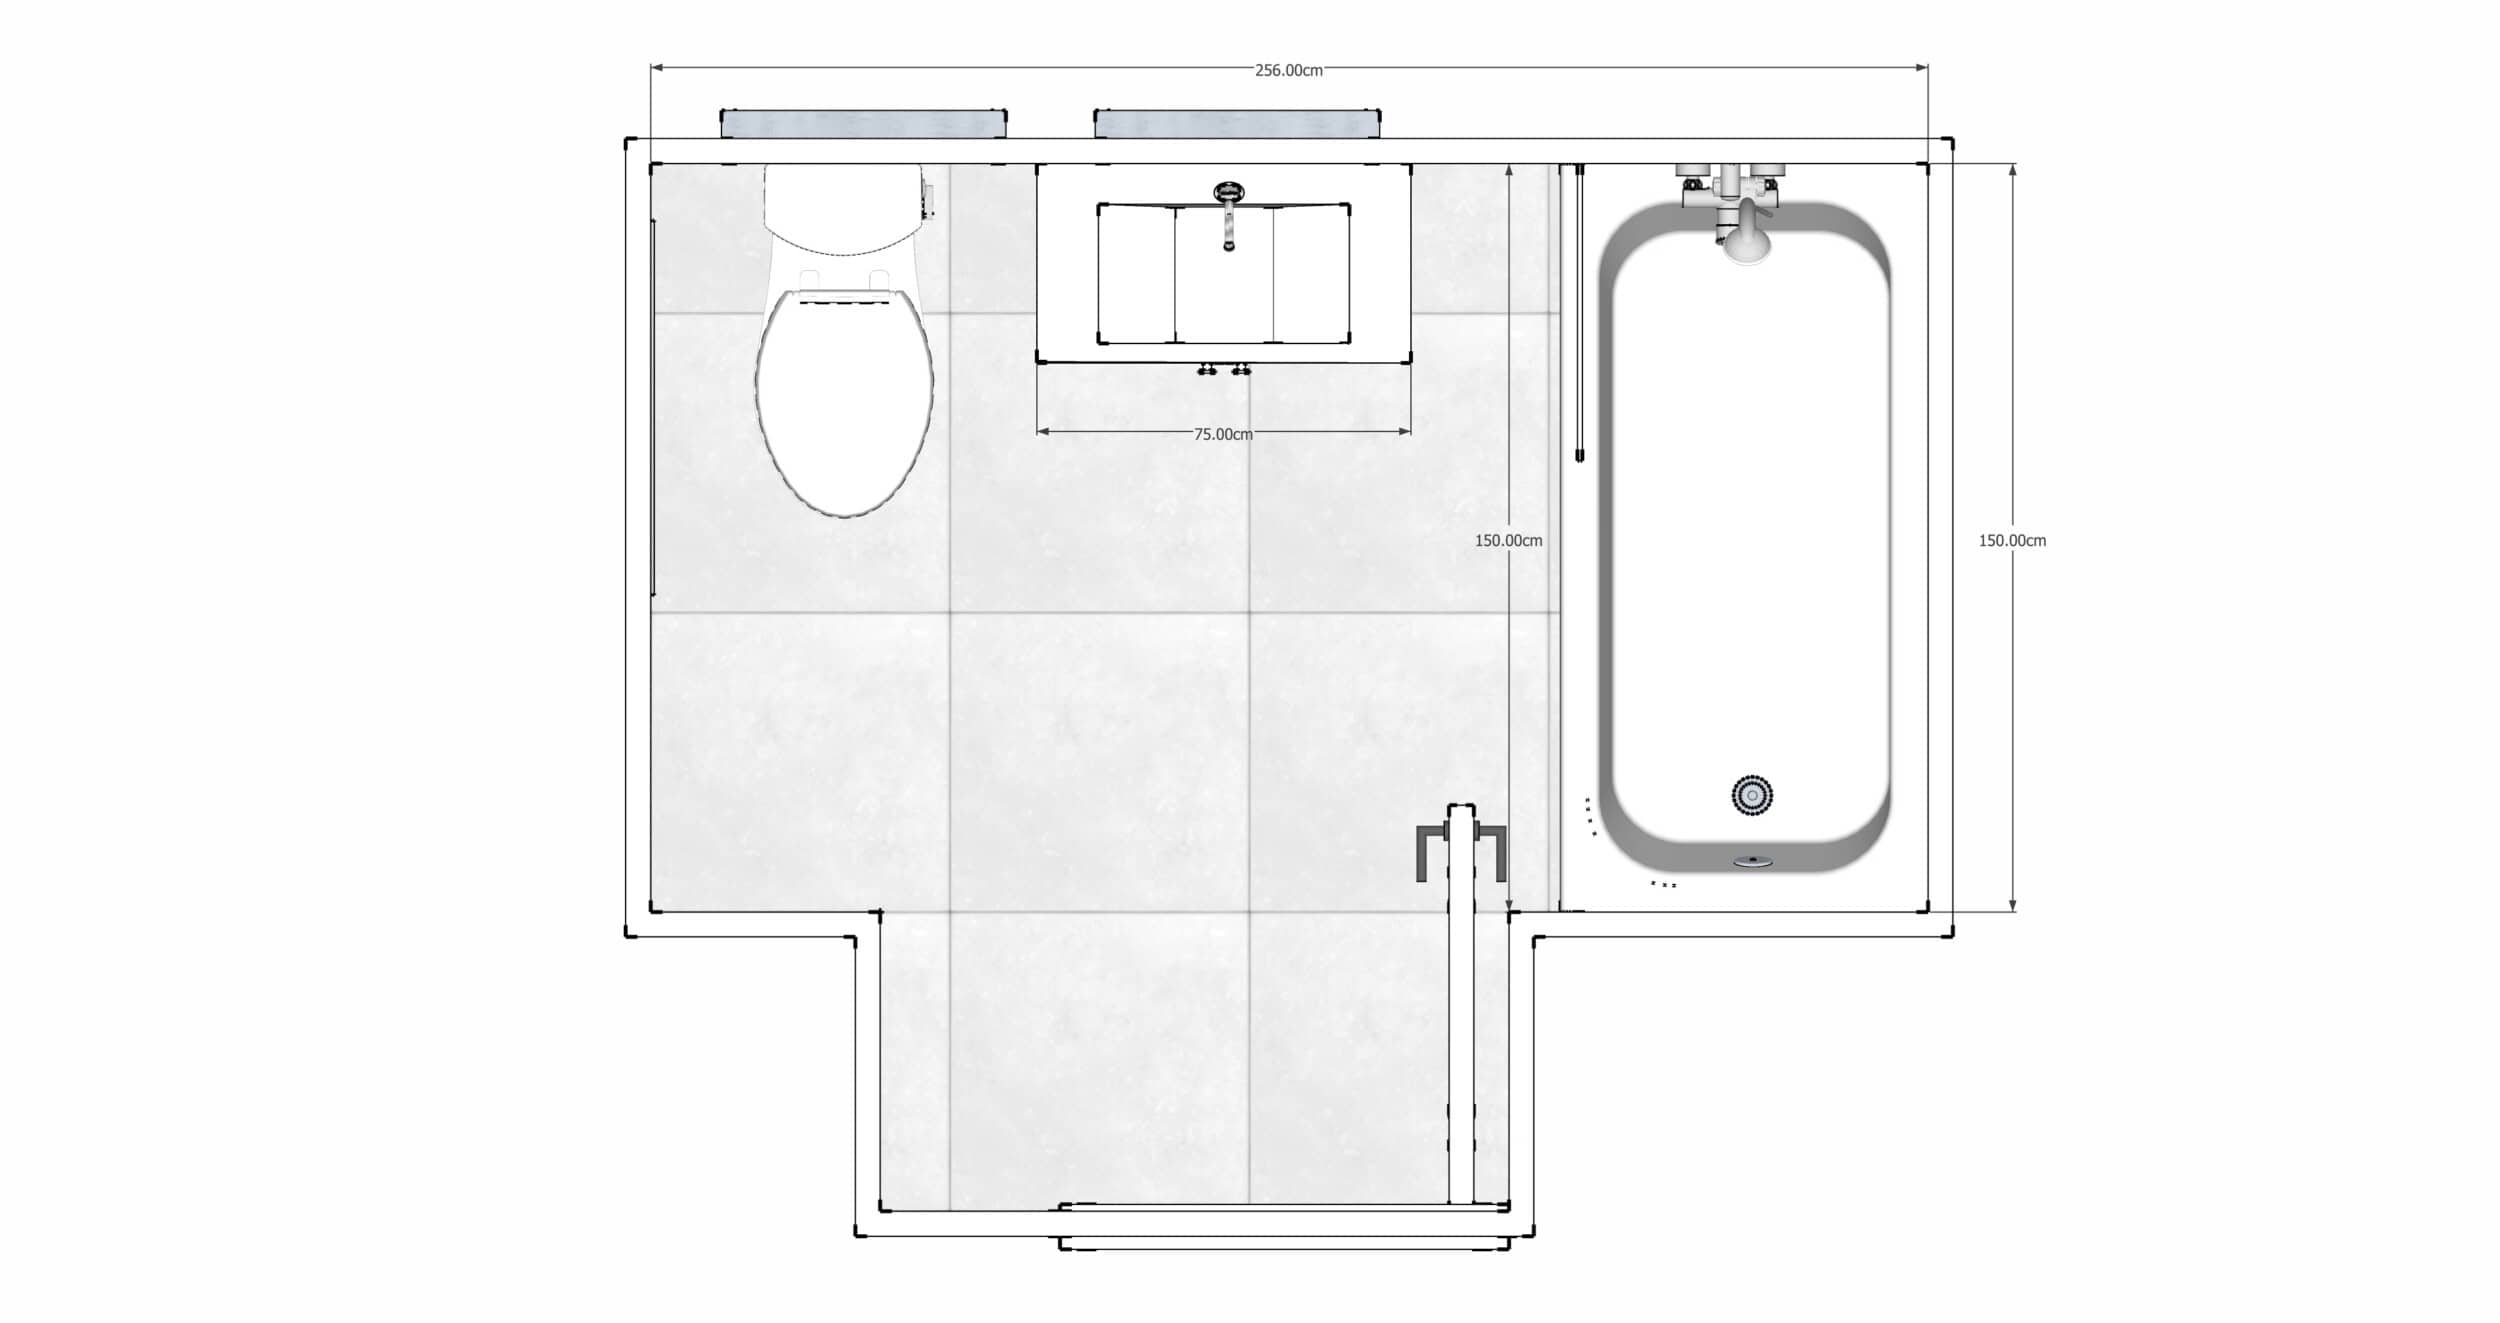
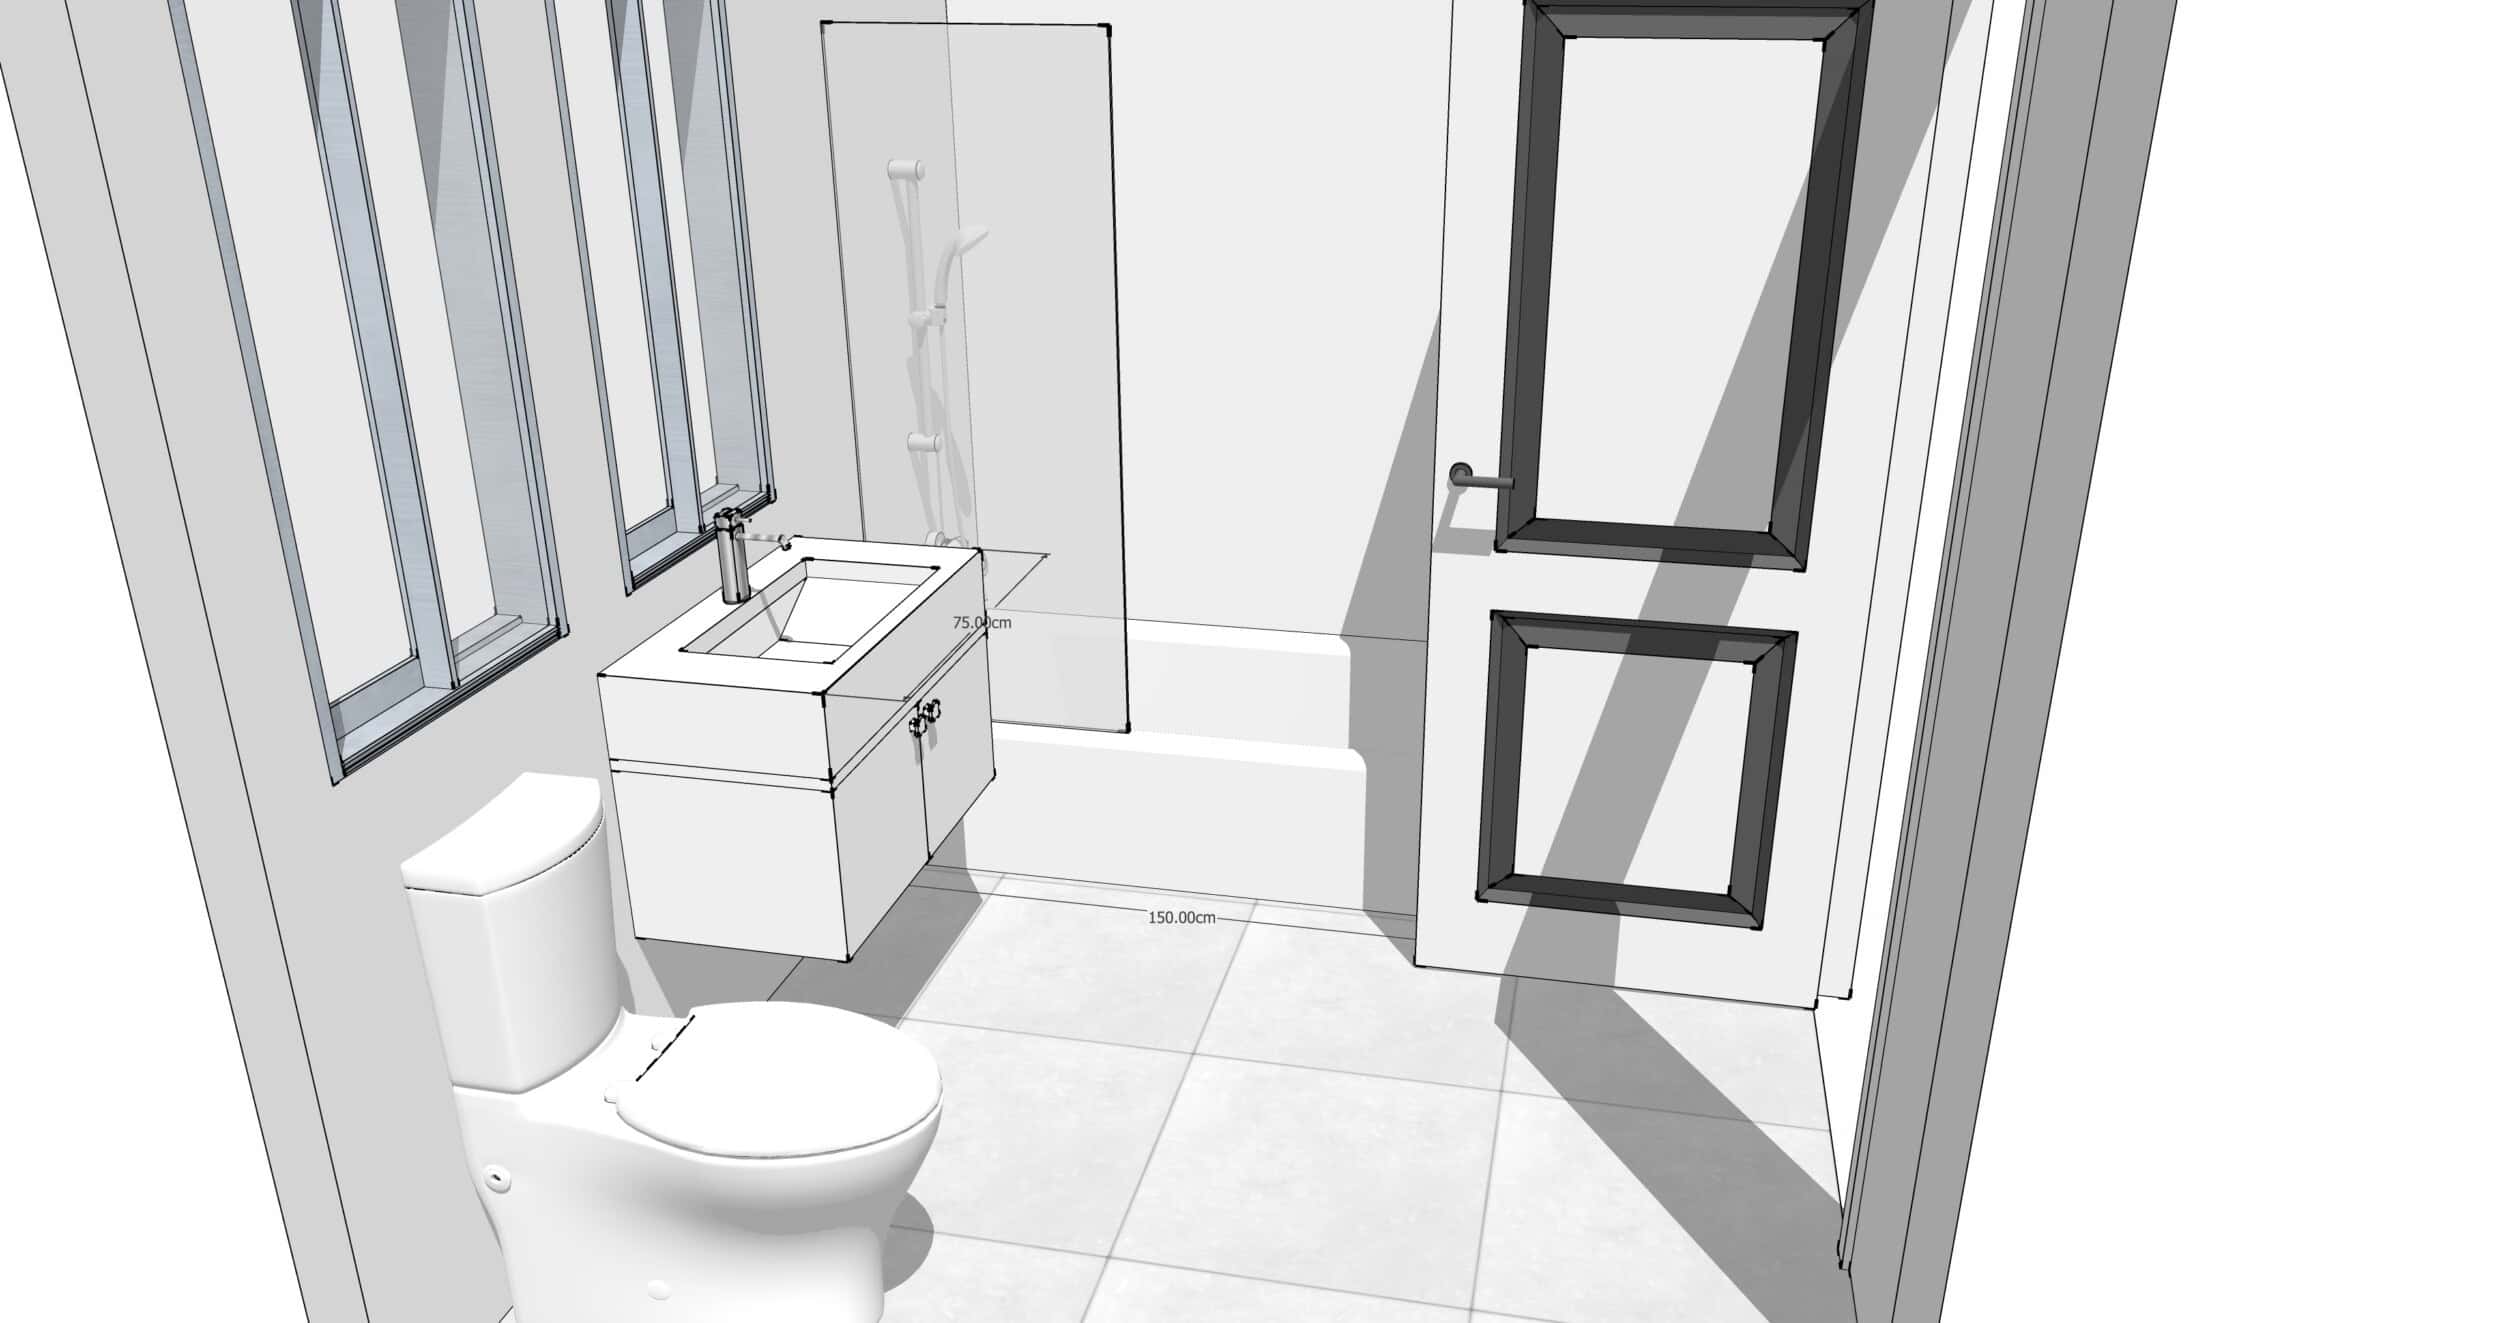
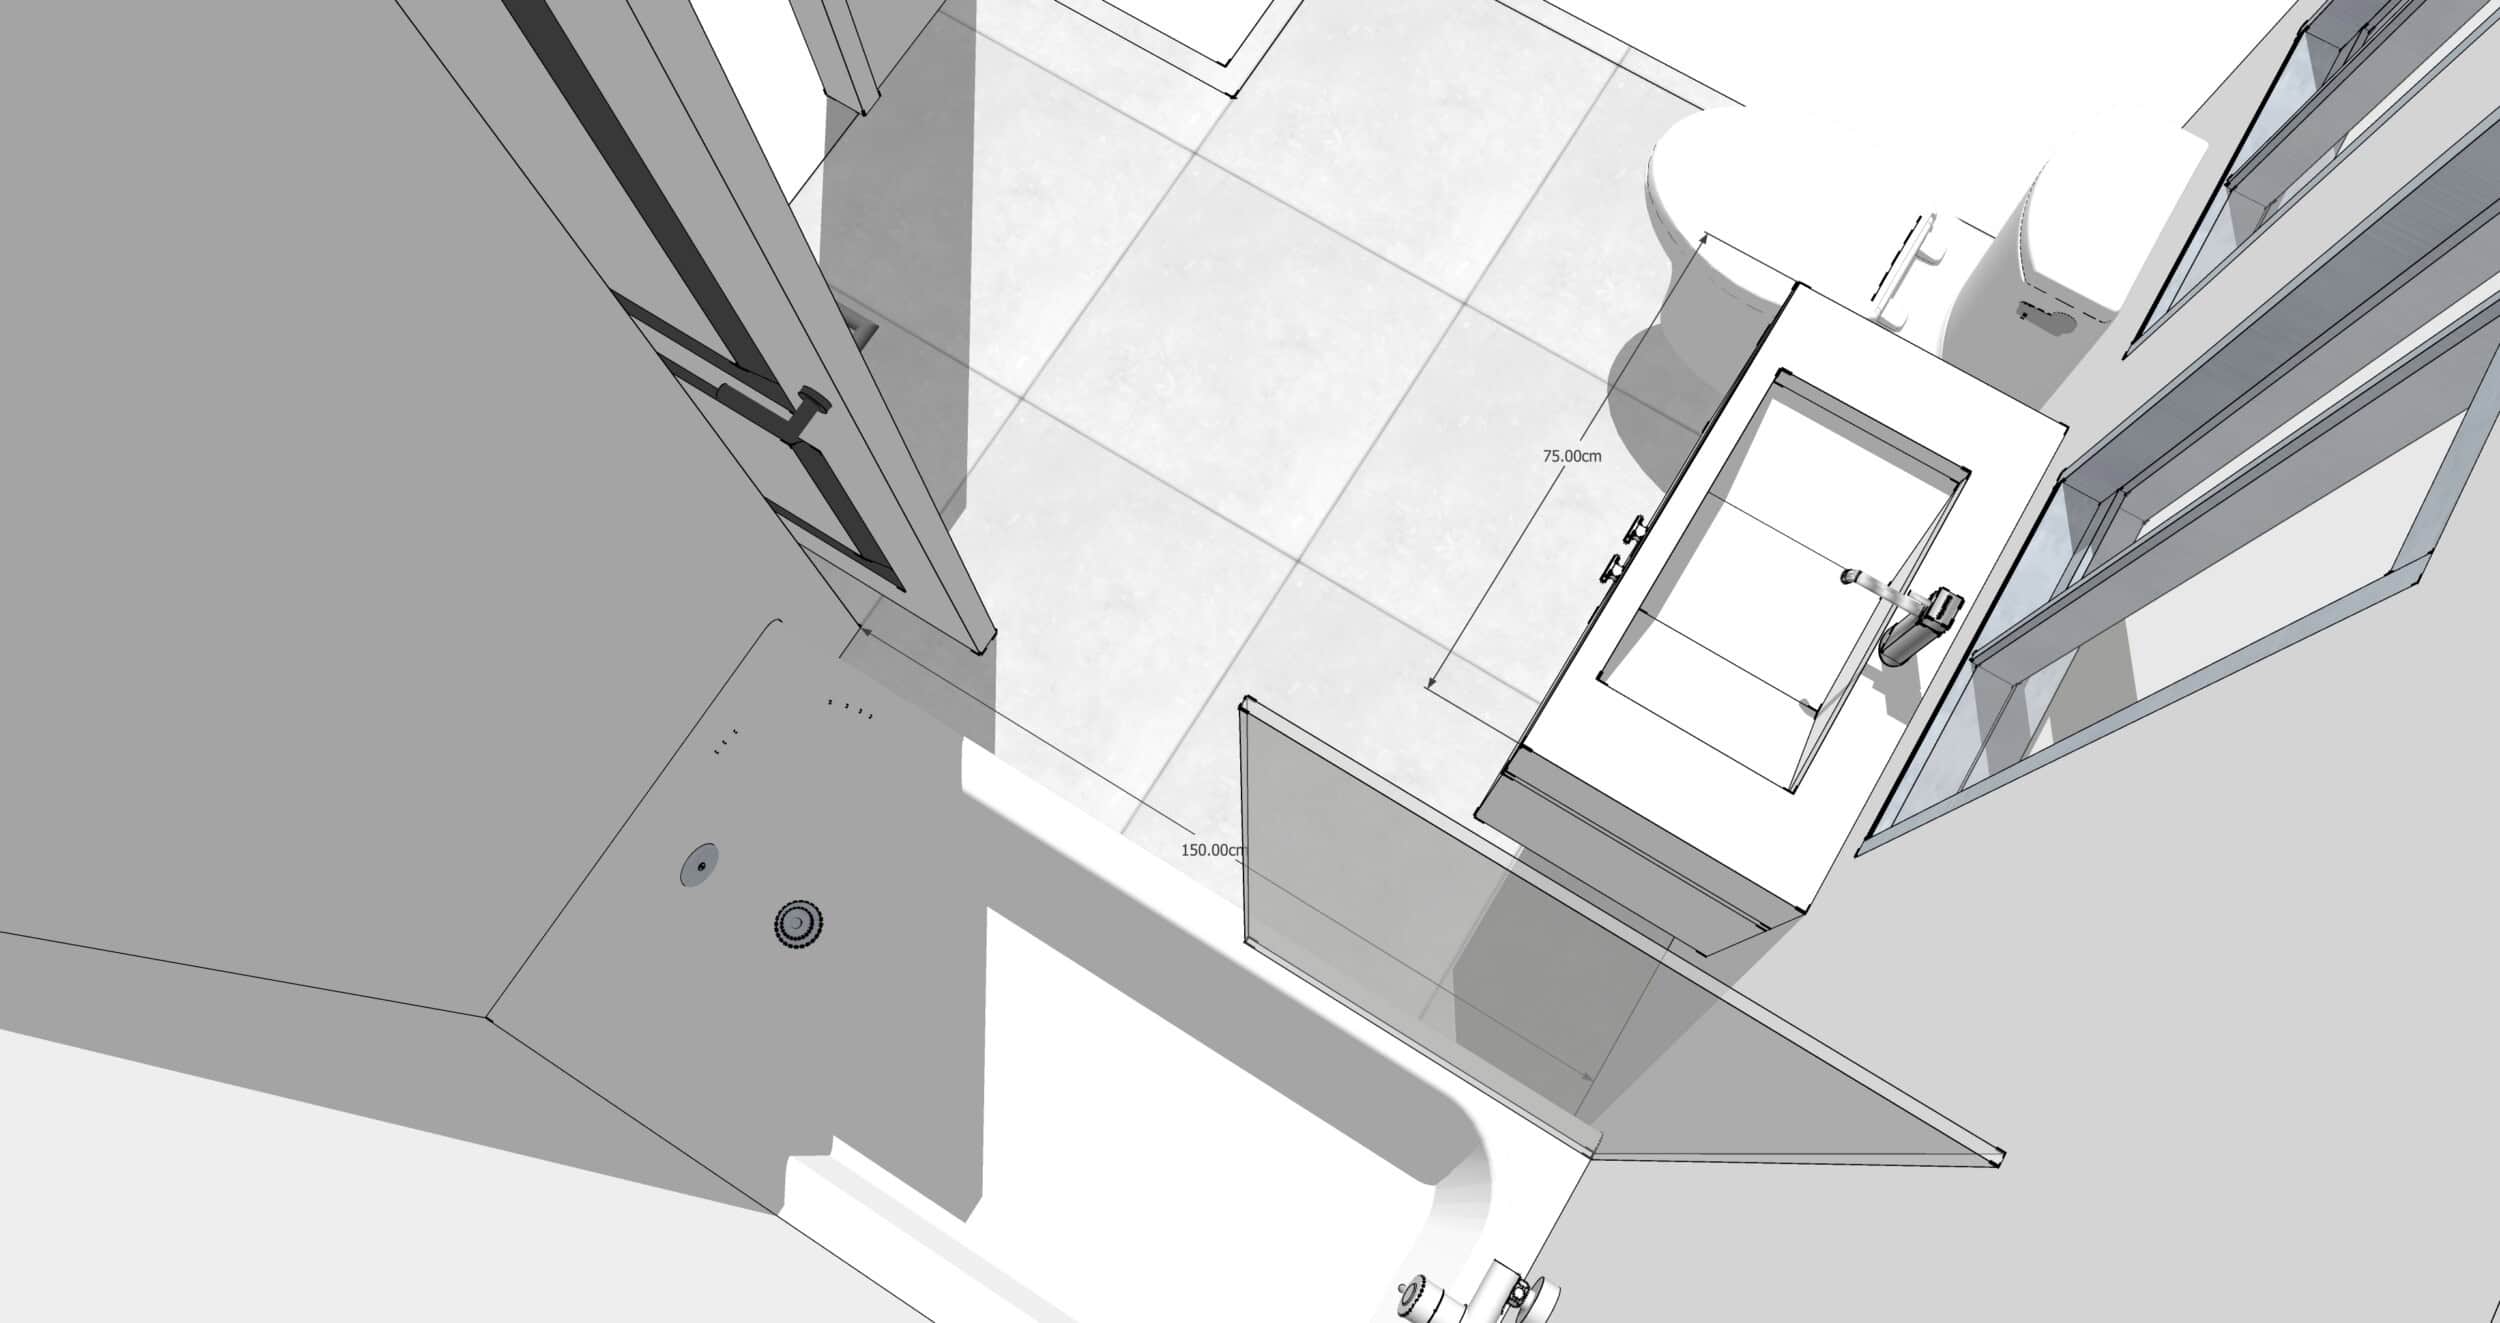
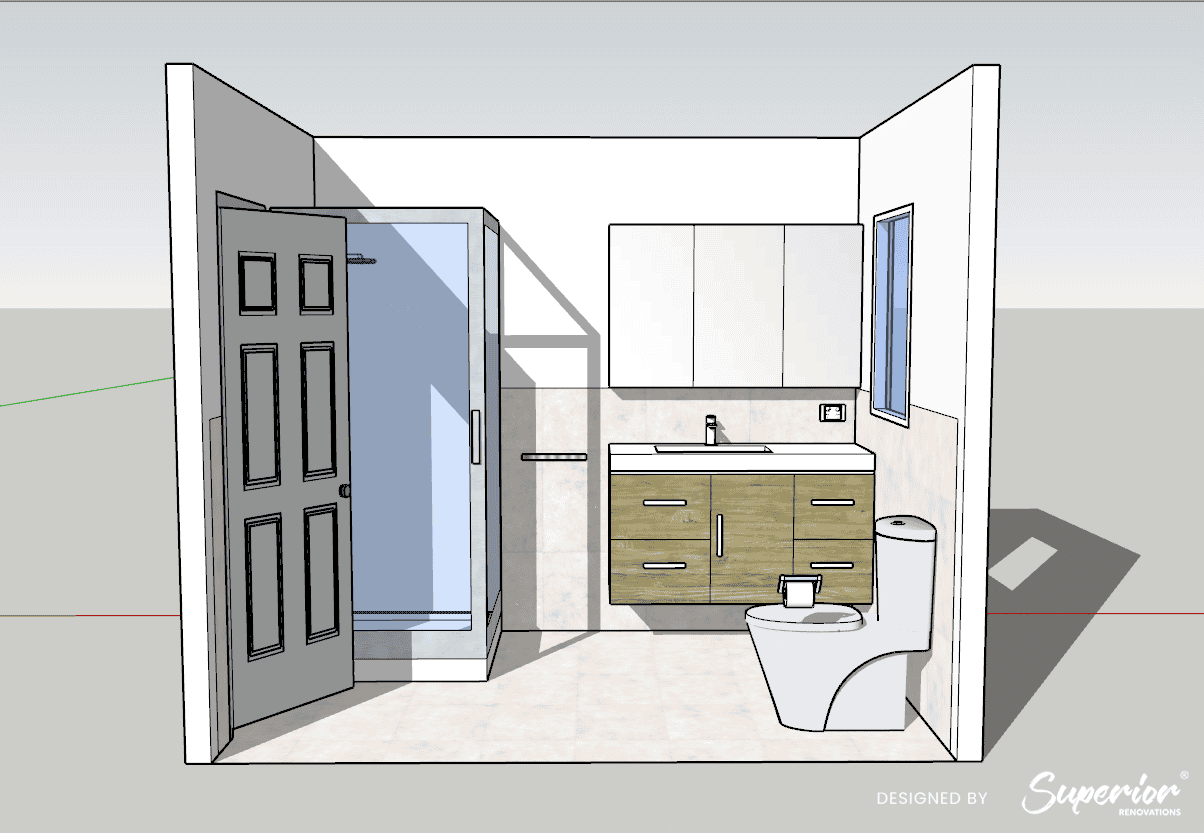
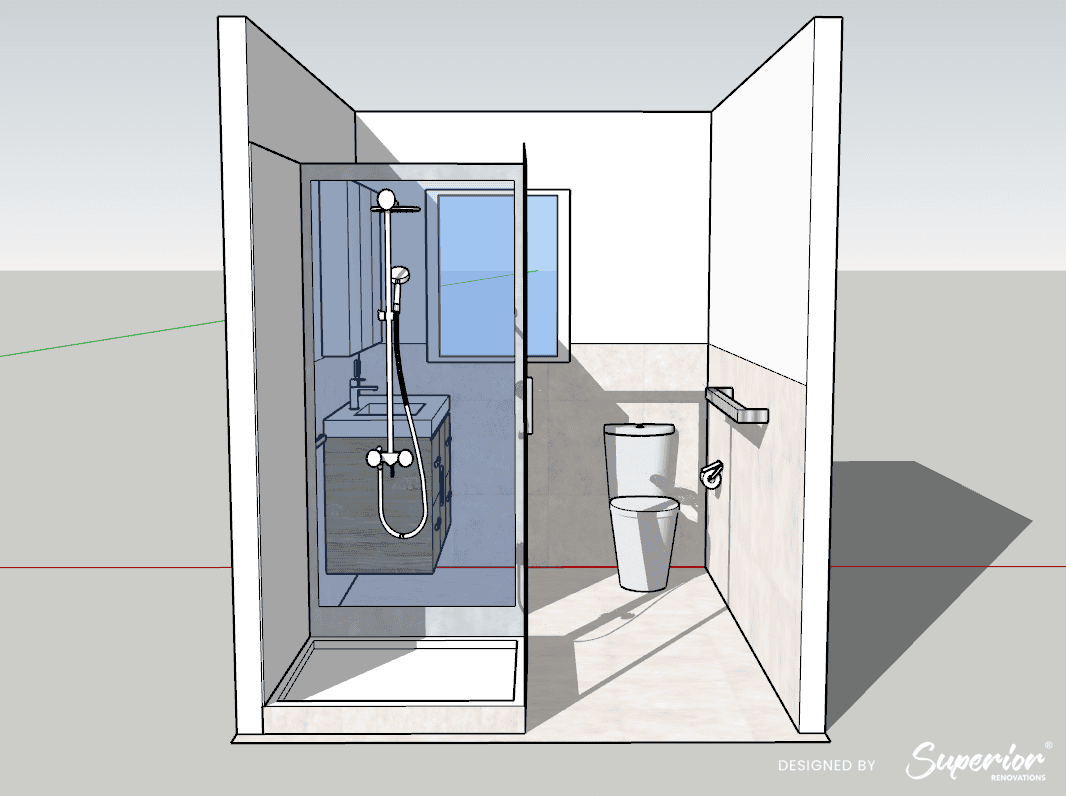
In a small bathroom, put all your plumbing on one wall wherever possible. A linear layout — toilet, vanity, and shower along the same wall — keeps the plumbing runs short (which saves money) and leaves one clear circulation path through the centre of the room. The shower goes at the far end, the vanity closest to the door.
We renovated an ensuite in a Hobsonville townhouse last year that was barely 3.5 m². The original layout had the shower by the door and the vanity at the back — you had to walk past a wet shower screen every morning just to brush your teeth. By flipping those two and installing a frameless glass shower panel at the far end, the entire experience changed. Same footprint. Same fixtures. Completely different room.
💡 Quick tip: In bathrooms under 4 m², a sliding or pocket door frees up about 0.7 m² of usable floor space that a standard swing door would eat. That’s enough to make the difference between cramped and comfortable.
Other small-bathroom moves that reinforce the golden rule:
Wall-hung toilets and floating vanities free up visible floor area, making the room feel larger and easier to clean. A wall-hung toilet also lets you adjust the distance from the back wall — useful in older Auckland homes where the existing plumbing position doesn’t give you ideal clearances.
Frameless glass shower panels separate the wet zone without visually dividing the room. A floor-to-ceiling glass panel is the single most effective way to zone a small bathroom — water stays in the wet zone, but your eye reads the space as one continuous room.
Consistent floor tile throughout — the same tile inside and outside the shower — reinforces the sense of a single space. Use a quality non-slip tile from The Tile Depot rated R10 or higher for the shower area.
Medium Bathrooms (5–8 m²) — The Auckland Family Bathroom
This is the classic three-piece family bathroom you’ll find in most post-war Auckland homes — the brick-and-tile places in Manurewa, the 1960s weatherboards in Mt Roskill, the older bungalows across the North Shore.
With 5–8 m², you have enough space to physically separate the wet and dry zones — not just visually, but with a partial wall, a glass partition, or even a change in floor level. This is where the golden rule really starts to pay off.
A common layout we use: vanity and toilet on the left as you enter (dry zone), shower and/or bath on the right behind a glass screen or half wall (wet zone). The towel rail sits between the two zones — close enough to reach from the shower, but in the dry area so towels actually dry properly. Sounds obvious. You’d be surprised how often towel rails end up inside the splash zone.
“In a family bathroom, I always recommend a semi-wet transition zone between the shower and the dry area — even if it’s just 300 mm of floor space with a slight fall toward the drain. It acts as a buffer and keeps the rest of the bathroom dry even when the kids forget to close the shower screen.”
— Dorothy Li, Design Manager, Superior Renovations
If you’re including a bath and a separate shower — common in family bathrooms — the bath can serve as a natural divider between zones. A freestanding bath positioned between the shower and the vanity creates an elegant visual separation while keeping the wet fixtures grouped together and the dry fixtures grouped on the entry side.
For a mid-range family bathroom renovation in Auckland, expect to budget $25,000–$35,000 for a full scope including design, supply, all trades, and project management. Use our bathroom renovation cost calculator for a more specific estimate based on your selections.
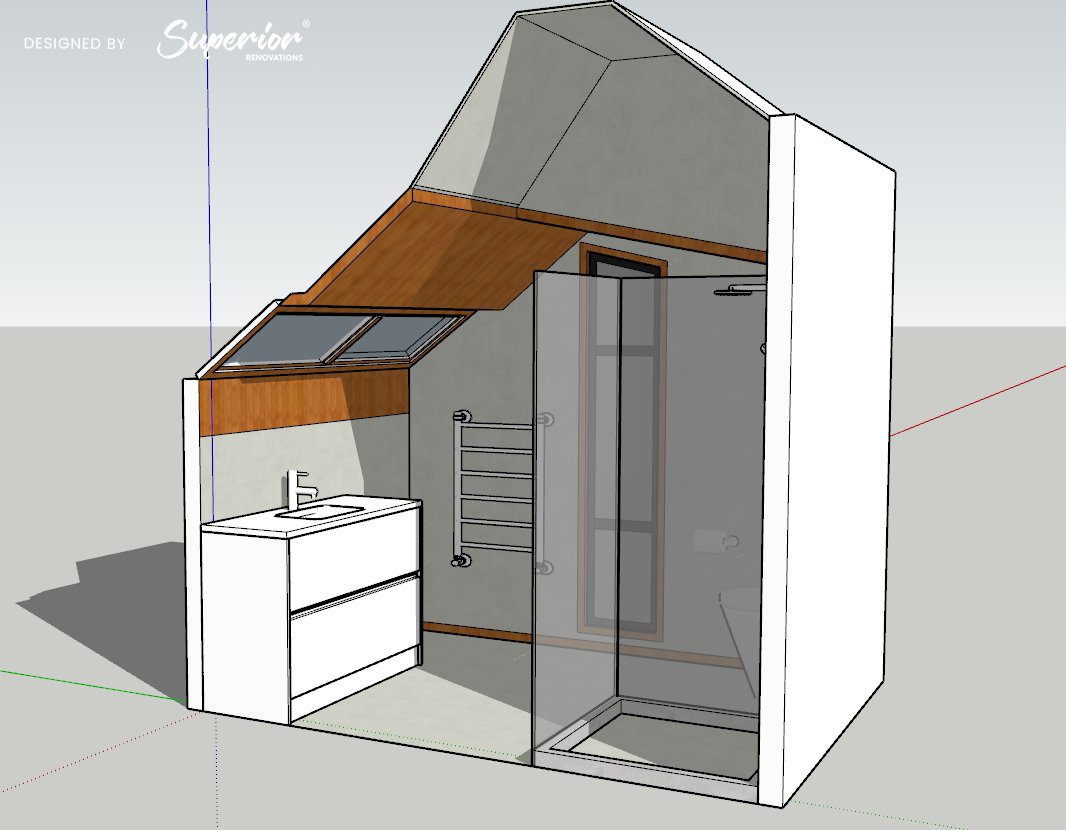
Large Bathrooms and Master Ensuites (8–12+ m²)
Bigger bathrooms bring more options — and more ways to get zoning wrong. The temptation in a large space is to spread fixtures across every wall, which breaks the zone structure and creates a room that feels disconnected rather than luxurious.
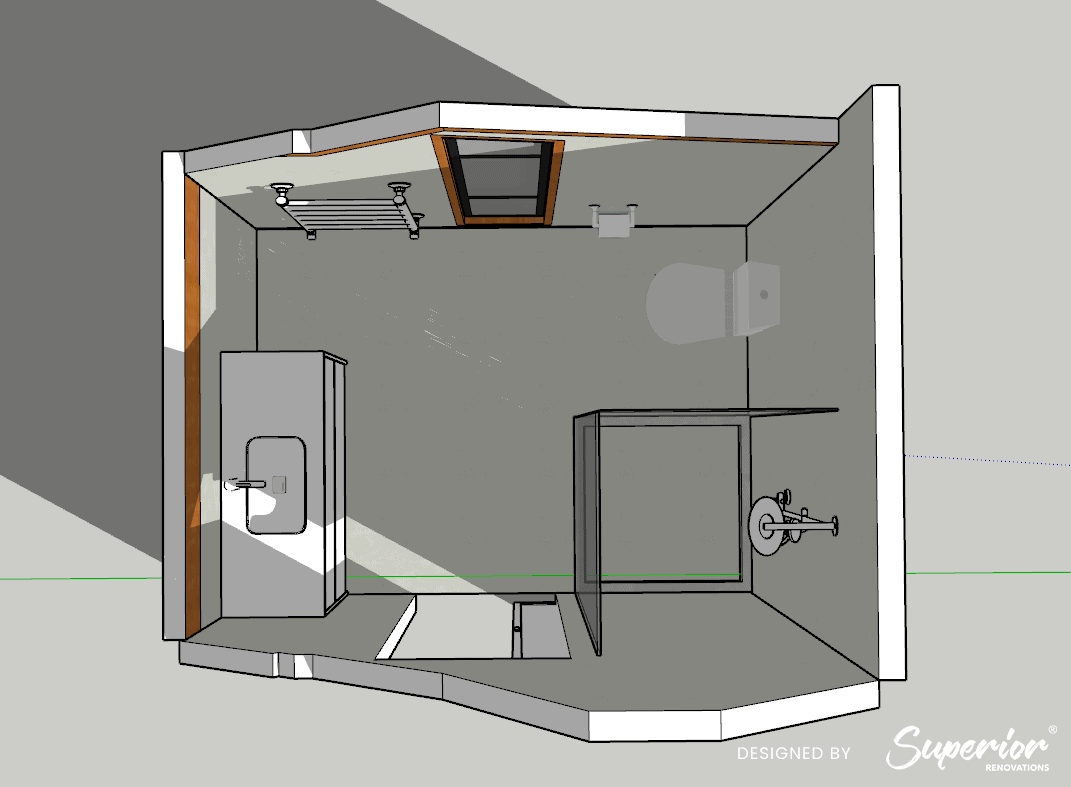
In a large ensuite, think of the space in three zones rather than two:
The dry zone (vanity, mirror, storage) anchors the entry. The semi-wet zone (toilet, possibly a freestanding bath) sits in the middle, creating a visual transition. The wet zone (walk-in shower, wet room area) occupies the furthest point from the door.
This three-zone approach is what you see in high-end hotel bathrooms — and it’s increasingly what Auckland homeowners in suburbs like Remuera, Herne Bay, and Epsom are asking for. Enclosed toilet rooms (a separate alcove or niche with its own door or partition) add privacy without losing the open-plan feel of the main space.
💡 Quick tip: If your ensuite is over 10 m², consider a dedicated drying zone between the shower and vanity — a 600–800 mm strip of floor with a heated towel rail. It’s a small luxury that stops wet footprints reaching the vanity area and makes the daily routine noticeably more comfortable.
For inspiration on how these layouts come together in real Auckland homes, browse our bathroom design gallery or visit our showroom at 16B Link Drive, Wairau Valley.
Five Bathroom Layout Mistakes Auckland Homeowners Make (and How the Golden Rule Prevents Them)
We’ve renovated hundreds of Auckland bathrooms. The layout mistakes we see most often aren’t dramatic — they’re the kind of thing that seems fine on a floor plan but drives you mad in daily use.
1. Toilet Facing the Door
This is the single most common layout mistake in NZ bathrooms. You open the door and the first thing you see — or the first thing your dinner guests see — is the toilet. It happens because the toilet is often placed nearest to the existing waste pipe, and nobody thought to question it.
The fix: position the toilet to the side, behind a partial wall, or at least perpendicular to the entry sightline. In the NZ Building Code’s guidance on toilet privacy (G1/AS1), the principle is clear — building users shouldn’t be able to see the toilet pan in the normal use of the building. The same principle should guide your home layout, even though residential bathrooms have more flexibility.
2. Cramming in Too Many Fixtures
A bath, a separate shower, double basins, and a toilet in 6 m². We’ve seen it attempted. It doesn’t work.
Every fixture you add shrinks the clearance zones around every other fixture. When you can’t comfortably dry off after a shower because the towel rail is 400 mm away and the toilet is right there — that’s a layout that prioritised fixtures over function. Sometimes less really is more. A single generous shower with a rainfall head and proper clearance will feel more luxurious than a cramped shower-plus-bath combination where you can barely turn around.
3. Ignoring the Door Swing
A standard hinged door swinging inward eats approximately 0.7 m² of floor space and can collide with the vanity, towel rail, or even the toilet. In Auckland’s older villas and bungalows — where bathrooms are often tight — this is a real problem.
Outward-swinging doors, sliding doors, or pocket doors solve it. A pocket door is the gold standard for small bathrooms. Yes, it costs more to install (typically $800–$1,500 above a standard door), but the floor space you gain is permanent.
💡 Quick tip: Before finalising your layout, open every drawer, every cabinet door, and simulate the door swing in your floor plan. If anything overlaps or blocks access, the clearances need adjusting. This five-minute check prevents expensive regrets.
4. Putting the Shower Next to the Door
When the shower is beside the entry, steam and water have a direct path out of the bathroom. The hallway gets humid. The bathroom floor is wet where you step in. And the vanity mirror fogs up faster because it’s further from the extraction fan and closer to the steam source.
Shower at the back, vanity at the front. Always. It’s the golden rule in practice.
5. Forgetting About Ventilation Zones
Auckland’s climate means bathrooms need proper ventilation — not just an extractor fan stuck somewhere on the ceiling. The fan should be positioned directly above or adjacent to the wet zone, pulling moisture at its source before it migrates into the dry zone. Under the NZ Building Code Clause G4 (Ventilation), all habitable spaces require adequate ventilation — and for bathrooms without openable windows, a mechanical extraction system is mandatory.
A well-zoned layout makes ventilation more effective because the moisture is concentrated in one area rather than spread across the whole room.
NZ-Specific Layout Considerations Auckland Homeowners Should Know
International bathroom design advice is everywhere. But Auckland homes have quirks that generic advice doesn’t cover.
Existing Plumbing Positions in Older Auckland Homes
In pre-1960s villas and bungalows across Grey Lynn, Ponsonby, and Mt Eden, the waste pipe for the toilet is often in a fixed position that’s expensive to move. The golden rule doesn’t mean you have to relocate plumbing — it means you design the best possible zone layout around what’s already there. Our advice to clients is always to keep the plumbing where it is and only change it if absolutely necessary. Relocating a toilet waste pipe can cost $1,000–$5,000 depending on access, and that’s money better spent on finishes or fixtures in most cases.
Waterproofing and the Wet Zone
Under NZ Building Code Clause E3, any glazing within 2 metres of the floor in bathrooms must be safety glass, and wet area membranes must comply with AS/NZS 4858:2004. When you zone your bathroom properly, the waterproofing scope is clearly defined — you know exactly which walls and floors need full membrane treatment and which need splash-zone protection only. This clarity can save $500–$1,500 in waterproofing costs compared to waterproofing the entire room floor-to-ceiling.
Auckland Council Consent and Layout Changes
Most like-for-like bathroom renovations — replacing fixtures in the same positions — don’t require Auckland Council building consent. But if you’re moving plumbing to new locations, removing walls, or making structural changes, consent is required. The consent process typically takes 4–8 weeks and costs $3,000–$8,000 for residential projects. Superior Renovations assesses this during your free in-home consultation and manages all consent applications on your behalf.
Future-Proofing With Accessible Design
The NZ Building Code Clause G1 requires that personal hygiene facilities for people with disabilities are accessible. Even in a standard residential renovation, it’s worth designing with the future in mind. A level-access shower (minimum 900 × 900 mm clear space), wider doorways (minimum 810 mm clear opening), and strategically placed blocking in the walls for future grab rails cost very little extra during a renovation but can save tens of thousands later if accessibility becomes necessary.
“We now design every family ensuite with future-proof access in mind. A wider doorway, a level-entry shower, and blocking for grab rails — these changes cost almost nothing during the build but make the space work for grandparents, kids, or anyone with mobility changes down the track.”
— Dorothy Li, Design Manager, Superior Renovations
For a full breakdown of what different bathroom renovations cost in Auckland, see our 2026 bathroom renovation cost guide.
Get Your Bathroom Layout Right From the Start
The golden rule isn’t complicated. Zone wet from dry. Maintain clearances. Design the flow from dry to wet as you move further into the room. Do that, and you’ve got a layout that works — one that’ll feel right on day one and still feel right a decade from now.
The hard part isn’t understanding the rule. It’s applying it to the specific bathroom you’ve got — with its fixed waste pipes, its odd dimensions, its window in the wrong spot, and its door that opens the wrong way. That’s where experience matters, and it’s exactly what our design team does for every project.
➡ Book your free in-home consultation with Superior Renovations
➡ Try our free bathroom renovation cost calculator
➡ Request a free feasibility report for your project
What is the golden rule for bathroom layouts?
The golden rule is zoning — separating your bathroom into distinct wet and dry areas. The wet zone (shower, bath) goes at the back of the room, furthest from the door. The dry zone (vanity, toilet, storage) sits closest to the entry. This keeps water contained, improves daily flow, and makes the space safer and more comfortable. Every fixture should have adequate clearance — at least 550 mm in front and 380 mm to the side for toilets.
How much clearance do you need around a toilet in NZ?
Best practice is a minimum of 380 mm from the toilet centreline to any wall or fixture on either side, and at least 550 mm of clear space in front. For comfort, aim for 750 mm in front if your layout allows it. The NZ Building Code (G1/AS1) sets accessibility requirements for public buildings, and while residential bathrooms have more flexibility, following these clearances makes a real difference to daily comfort.
What size should a shower be in a New Zealand bathroom?
The minimum recommended internal shower size in NZ is 900 × 900 mm. For a more comfortable experience — especially in a family bathroom — we recommend at least 1,000 × 1,000 mm. Walk-in showers in larger ensuites typically start from 1,200 × 900 mm. Ensure at least 600 mm of clear space at the shower entry for safe access.
Do I need building consent to change my bathroom layout in Auckland?
If you're replacing fixtures in the same positions, consent is generally not required. However, moving plumbing to new locations, removing or adding walls, or making structural changes typically requires Auckland Council building consent. Processing takes 4–8 weeks and costs $3,000–$8,000 for residential projects. Superior Renovations assesses consent requirements during your free consultation.
How much does a bathroom renovation cost in Auckland in 2026?
A mid-range full bathroom renovation in Auckland costs $25,000–$35,000 including design, supply, all trades, and project management. Budget refreshes start from $9,000–$16,000. Luxury or custom bathrooms — wet rooms, premium fixtures, high-end brands — start from $45,000 upwards. Use the Superior Renovations bathroom cost calculator for a personalised estimate.
Should the toilet face the bathroom door?
No. The toilet should never be the first thing you see when opening the bathroom door. Position it to the side, behind a partial wall, or perpendicular to the entry sightline. The NZ Building Code guidance on privacy (G1/AS1) states that toilet pans should not be visible in the normal use of a building. The same principle should guide residential layouts.
What is wet and dry zoning in a bathroom?
Wet and dry zoning divides your bathroom into areas based on water exposure. The wet zone contains the shower and bath — areas that need full waterproofing and slip-resistant surfaces. The dry zone contains the vanity, toilet, and storage. Separating these zones prevents water from migrating across the floor, reduces mould risk, protects cabinetry, and makes the bathroom safer and easier to clean.
Can you have a bath and separate shower in a small Auckland bathroom?
It depends on the size. In bathrooms under 5 m², fitting both a bath and a separate shower usually means sacrificing clearance space around one or both — which breaks the golden rule. A shower-over-bath combination is often the better option in compact spaces. In bathrooms 6 m² and above, a separate bath and shower can work well when positioned together in the wet zone.
How do I make a small bathroom feel bigger with layout?
Use a linear layout with plumbing on one wall. Install a frameless glass shower panel instead of a shower curtain or framed enclosure. Choose a floating vanity and wall-hung toilet to expose more floor area. Use the same floor tile inside and outside the shower for visual continuity. A pocket or sliding door saves about 0.7 m² of floor space compared to a standard swing door.
Is it worth hiring a designer for a bathroom layout?
For bathrooms over $20,000 in scope, a designer typically saves you more than their fee by avoiding layout mistakes, optimising clearances, and selecting materials that work together. Superior Renovations includes design as part of every bathroom renovation package. Our in-house design team — including specialists Cici Zou and Alison Yu — works with you to plan the layout before any construction begins.
What is the best bathroom layout for an Auckland villa?
Auckland villas typically have small, narrow bathrooms with fixed waste pipe positions. The best layout keeps plumbing on the existing wall, places the vanity nearest the door, positions the toilet perpendicular to the entry sightline, and puts the shower at the far end with a frameless glass panel. A pocket door and floating vanity maximise the limited floor space without requiring structural changes.
Further Resources for your bathroom renovation
- Featured projects and Client stories to see specifications on some of the projects.
- Real client stories from Auckland
Need more information?
Take advantage of our FREE Complete Home Renovation Guide (48 pages), whether you’re already renovating or in the process of deciding to renovate, it’s not an easy process, this guide which includes a free 100+ point check list – will help you avoid costly mistakes.
Download Free Renovation Guide (PDF)
Still have questions unanswered?
Book a no-obligation consultation with the team at Superior Renovations,
we’d love to meet you to discuss your renovation ideas!
[contact-form-7]
Or call us on 0800 199 888

Have you been putting off getting renovations done?
We have partnered with Q Mastercard ® to provide you an 18 Month Interest-Free Payment Option, you can enjoy your new home now and stress less.
Learn More about Interest-Free Payment Options*
*Lending criteria, fees, terms and conditions apply. Mastercard is a registered trademark and the circles design is a trademark of Mastercard International Incorporated.
The post Golden Rule for Bathroom Layouts in NZ (2026) appeared first on Superior Renovations. #superiorrenovations


Comments
Post a Comment