12 Auckland Renovation Regrets (And How to Fix Them)
Originally posted on 12 Auckland Renovation Regrets (And How to Fix Them)
Superior Renovations - Auckland’s Trusted Home Renovation Specialists
Quick answer: The most common Auckland renovation regrets aren’t the big things — they’re the small ones. Not enough power points. Storage that’s already too tight. A freestanding bath nobody uses. Lighting that leaves you standing in the dark over a brand-new island. Eleven of the twelve trace back to one decision: skipping the design phase.
It’s a Wednesday night in Glendowie. The kitchen renovation finished six weeks ago. You’re standing at the island, chopping onions for dinner, and you suddenly realise you’re working in your own shadow. The only lighting is the downlight behind you. The pendants you talked about got “value-engineered” out somewhere between the quote and the final variation. There’s nowhere to plug in the food processor without unplugging the kettle.
It’s not a disaster. The kitchen looks great in photos. But every night for the next twenty years, you’ll know.
That’s what a renovation regret actually looks like — not a catastrophic failure, but a small one that hits you six months after handover and sits there. We’ve worked on more than 1,000 Auckland renovations across the city, from villas in Grey Lynn to family builds in Hobsonville to character bungalows in Titirangi. The regrets we hear most often are almost never about the headline decisions. They’re about the small ones nobody thought to ask about.
Here are the twelve we hear most — paired with the small fixes that would have prevented each one.
1. Not Enough Power Points — And All of Them in the Wrong Places
This is the single most common regret we hear in post-handover conversations. The reason is structural: when you’re staring at a plan on a piece of paper, you can’t picture where you’ll actually plug things in. So you default to “a few in the kitchen, a couple in the bedrooms,” and call it sorted.
Then you move back in. The toaster, kettle, and coffee machine all want the same double socket. The home office in the spare room has one outlet for the laptop, monitor, charger, and lamp. The bedside table has nowhere to charge a phone without a cord trailing across the floor.
The fix is small and almost free — if you make it during the design phase. Doubling the power points in a kitchen renovation typically adds $300–$700 to the electrical scope. Adding USB-C and HDMI runs through the walls while the GIB is off costs a few hundred dollars more. After handover, the same upgrade means cutting open finished walls and re-skimming — three or four times the price, plus the disruption.
💡 Quick tip: Walk through the room in your head and physically count where you’d plug things in — phone chargers, lamps, vacuum cleaner, Christmas tree, hair straightener. Now add 50%. That’s the right number. PDL by Schneider Electric sells switch plates that include integrated USB-C, which solves the bedside problem cleanly.
2. Storage That’s Already 30% Too Small Before You’ve Moved Back In
Every kitchen we ever build is, in hindsight, undersized for storage. The same is true of bathrooms. Pantries. Laundry rooms. We don’t say this because clients are wrong about how much they own — we say it because most people genuinely don’t know how much they own until they take it out of the old cupboards and try to put it back into the new ones.
The plates fit. The pots fit. The thirty-eight Tupperware lids and the food processor attachments and the four trays nobody uses but can’t throw out — they don’t. Within six months, the pantry has overflowed onto the bench. The corner of the kitchen you swore you’d keep clear has a row of appliances on it. The same kitchen you renovated to declutter is now exactly as cluttered as the old one.
The fix sits in the design phase, not the build phase. Specifying full-height pantry units instead of standard 720mm uppers. Adding a scullery if the layout allows. Choosing internal drawer systems from Laminex’s Innodek range over fixed shelving, so you can actually reach the back. Specifying corner solutions — Le Mans pull-outs or carousels — instead of writing off corner cabinets as dead space.
“The conversation I have with every kitchen client now is: tell me what’s in your worst drawer right now. Not your best one. The chaos drawer. The kitchen we design has to absorb that without you having to fix yourself first. People think a renovation will make them tidier. It doesn’t. It just gives the same amount of stuff better places to live.”
— Alison Yu, Designer, Superior Renovations
💡 Quick tip: Before your design consultation, photograph the inside of every cupboard and drawer in your current kitchen. Bring the photos with you. A designer planning around your real storage habits will spec a kitchen that fits 20–30% more than one designed around a wish list.
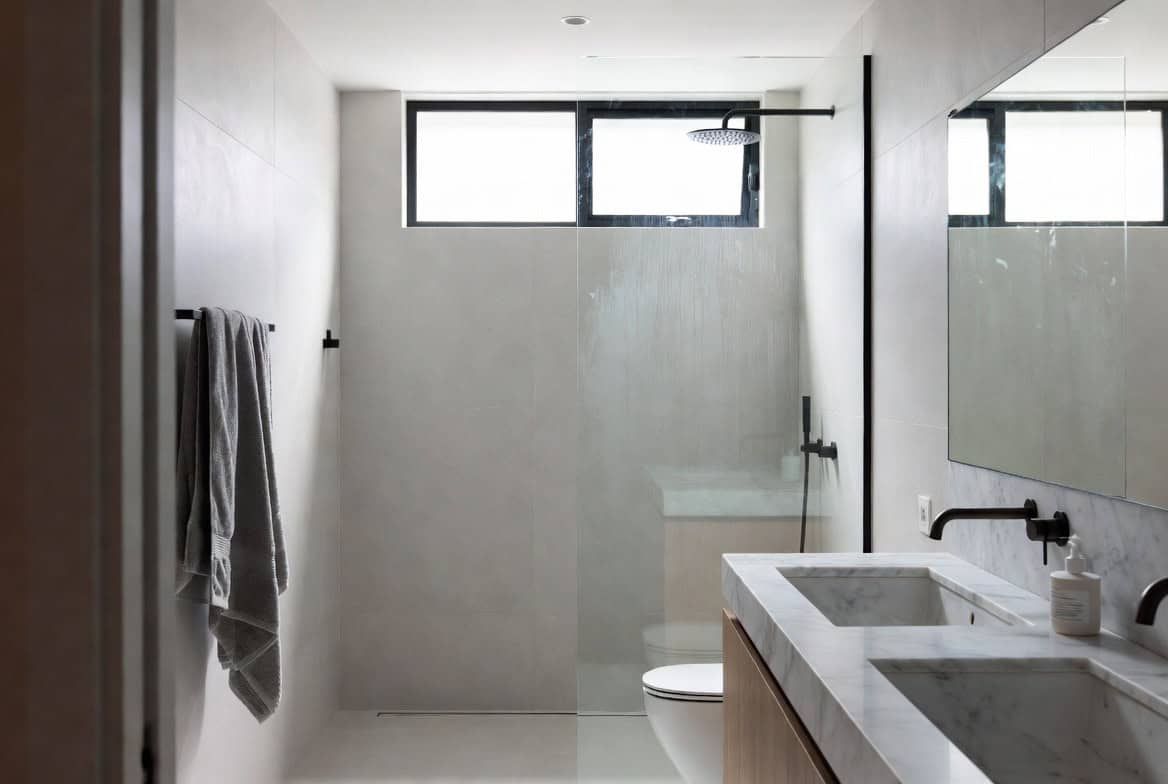
3. The Freestanding Bath That’s Held Water Exactly Twice
We’ve installed hundreds of freestanding baths. We’ve also returned to those bathrooms two or three years later for unrelated work and asked, casually, how the bath is going. A surprising number of clients laugh and admit they’ve used it once or twice — usually right after handover for the Instagram photo, and maybe one other time.
The bath is beautiful. It’s also a 230-litre water-hungry sculpture that sits in the middle of a bathroom, makes cleaning harder, and pushes the shower into a smaller corner than it needed to be. In a Mt Albert ensuite we did last year, removing the freestanding bath from the brief mid-design gave us 600mm more shower floor and a double vanity — both used every single day. (We’ve written more on this in our common bathroom renovation mistakes piece, which covers the layout-killing decisions in more depth.)
The fix isn’t “don’t get a freestanding bath.” It’s: be honest about whether you actually take baths. If the answer is “not really, but I might one day,” that’s a decision that costs roughly $1,800–$4,500 in fixtures alone, plus the floor space and the plumbing rework. Our bathroom renovation team in Auckland now treats this as one of the three or four questions we ask up front, every time. If you have small kids who’ll outgrow bathing in three or four years, build the bath in as a built-in option that fits the family for the period it’s needed, not as a sculptural centrepiece for life.
“I ask every bathroom client one question: when’s the last time you had a bath? If they can’t remember, we’re designing a shower bathroom. If they say ‘last week,’ we’re designing for the bath. The middle answer — ‘I might if I had one’ — is the answer that ends up with a beautiful bath full of dust by year two.”
— Cici Zou, Certified Designer (NZ Dip. Interior Design), Superior Renovations
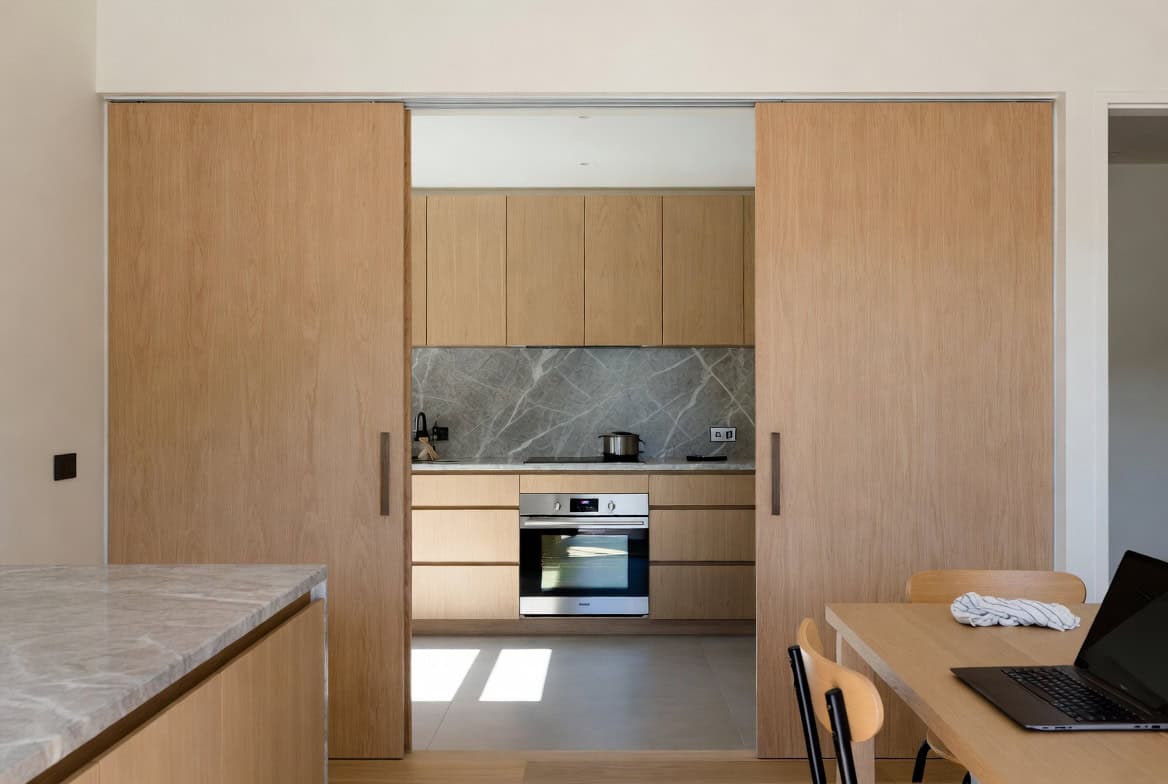
4. Going Open-Plan Without Thinking About Acoustics, Smell, or Where You Hide From Your Kids
Open-plan kitchen-living was the headline renovation move of the last fifteen years. Then people lived in them. The regret isn’t the open plan itself — it’s the absence of any way to close part of it off when you need to.
The pattern goes: every meal is a stir-fry now, and the smell sits in the lounge curtains for the next two days. The dishwasher is loud enough to drown out the TV. When the kids have their friends over to play, there’s no second living space — it’s all one room, and you’re in it. When you’re on a work call from the kitchen table, everyone in the house can hear it.
The small fix is a partial wall, a pair of cavity sliders, or a pivot door — anything that lets you close part of the open plan when you need to. A scullery off the kitchen handles the noise and smell problem on its own. A second living area, even a small one — what we used to call a snug — handles the “nowhere to escape the kids” problem.
“Full open-plan suits about half the families who request it. The other half need a soft separation — a way of being together but not on top of each other. We almost never design a completely open downstairs anymore. It’s always 80% open, 20% acoustically separated. That last 20% is what actually makes the space liveable.”
— Dorothy Li, Design Manager, Superior Renovations
5. The Winter You’ll Wish You’d Spent $4,000 More on Insulation
If you’re renovating a villa, bungalow, or anything built before the mid-1990s in Auckland, the walls and ceilings are likely either uninsulated or carrying R-1.8 batts that have slumped to roughly half their rated value. The current NZ Building Code H1 insulation requirements for Auckland (Climate Zone 1) call for R-2.0 walls and R-6.6 ceilings on new builds — older homes rarely come close.
When the GIB is off and the framing is exposed during a renovation, retrofitting insulation costs a fraction of what it costs at any other time. Roughly $4,000–$8,000 to upgrade ceiling and wall batts in a 120m² renovation, depending on the scope. The regret isn’t about money during the build — it’s about every winter for the next thirty years.
A client we worked with in Sandringham last year added wool insulation through the whole house during a partial reno. Their first winter power bill dropped by about 30% compared to the previous one, and the upstairs bedrooms — which had been condensation-prone for years — stopped streaming with water on cold mornings. Nobody ever calls us to regret spending $6,000 on insulation. Plenty of people call to ask if we can come back in three years to retrofit it, and we have to explain that the cost is now closer to $14,000–$20,000 because the GIB needs to come off again. The same logic applies during a house extension in Auckland — the new walls are open already, so the marginal cost of upgrading the existing insulation alongside is one of the cheapest performance wins available.
💡 Quick tip: If your renovation involves opening up exterior walls or ceilings, insulation is a one-time-only opportunity. Once the GIB goes back on, you’re stuck with whatever’s behind it for the life of the house. Even if the budget is tight, the insulation line should be the last one you cut, not the first.
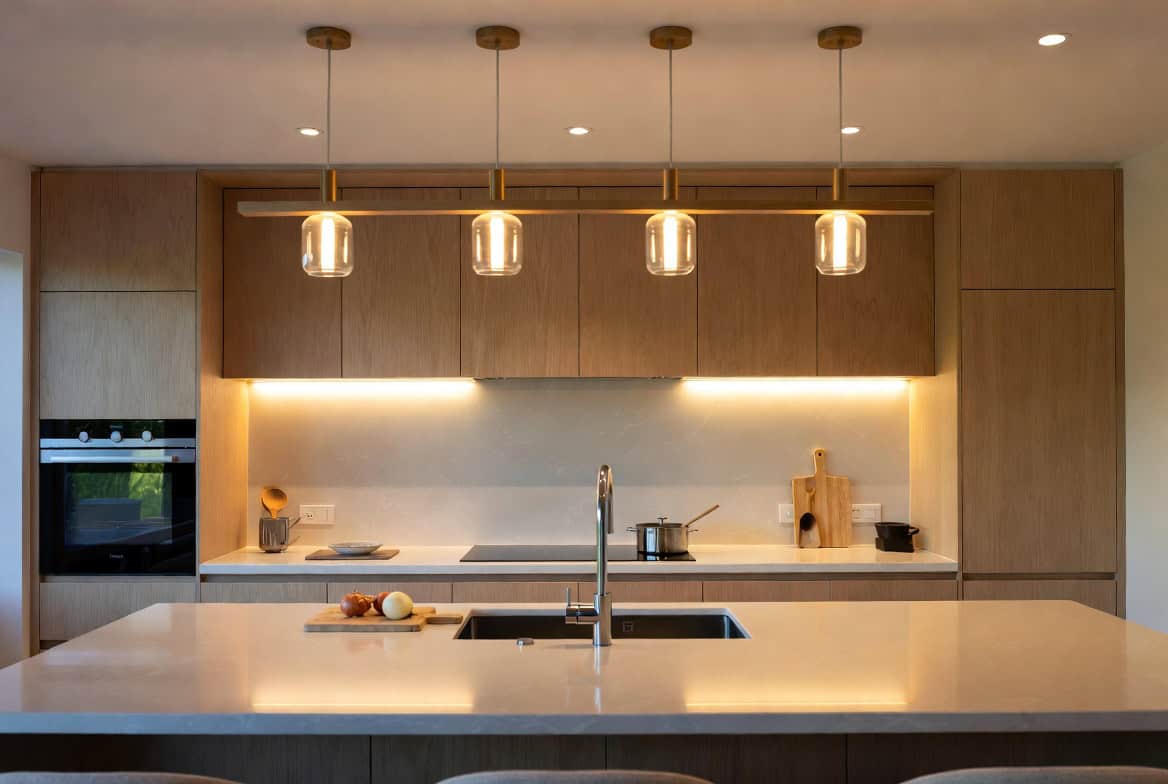
6. Forgetting Lighting Layers — Standing in the Dark Over a Brand-New Island
Most renovation lighting plans we see from elsewhere are some variant of: downlights, evenly spaced, on one switch. Maybe a pendant over the island if someone remembered. That’s not a lighting plan. That’s a ceiling decoration plan.
A proper kitchen has at least three layers of light: ambient (the downlights), task (focused light on the bench, the cooktop, and the sink — usually under-cabinet LED strips and pendants directly over the island), and accent (decorative — pendants over the dining table, toe-kick LED for nighttime). The same goes for living areas: ambient ceiling light, task lamps for reading, and accent lighting for the wall art and shelving.
The fix is small if you do it during the design phase. A second lighting circuit through the kitchen typically adds $800–$1,500 to the electrical scope. Under-cabinet LED strips add another $400–$900. Dimmers on every circuit add roughly $80–$150 per switch. Doing all three at the design stage costs around $2,000–$3,500. Doing any of it after the kitchen is built means cutting open finished cabinetry, which usually isn’t economically rational.
“The cheapest, fastest way to make a finished kitchen look expensive is to put light exactly where it needs to be — over the bench, under the cabinets, and over the island. A $40,000 kitchen with one row of downlights looks like a $20,000 kitchen. A $20,000 kitchen with proper lighting layers looks like a $40,000 one. Lighting is the part of the job clients underrate most consistently.”
— Alison Yu, Designer, Superior Renovations
7. Putting the Laundry Where You Wish You Hadn’t
The most common Auckland laundry mistake we see is leaving it where it was — usually a cold cupboard off the back porch in a villa, or a strip behind a bifold in the kitchen of a 1990s house. The renovation refits the appliances but doesn’t ask the bigger question: is this still where the laundry should be?
A laundry that’s two flights of stairs from the bedrooms means everyone wears clothes for an extra day before washing them. A laundry that opens into the kitchen means dirty washing is in your line of sight every time you make dinner. A laundry crammed into a 1.5m strip with no folding bench means you fold on the bed, or the couch, or you don’t fold at all.
The fix is usually a layout change, not a budget increase. Combining the laundry with a mudroom or a downstairs WC. Moving it closer to the bedrooms during a full house reno. Allowing 600mm of folding bench, even at the expense of a slightly smaller second washing basket. In a Howick reno last year, we relocated the laundry from a hallway cupboard to a small room off the back of the garage — same square metres, much better workflow. Total cost of the move was around $6,000 on a $140,000 reno. The client emailed us six months later to say it was the single best decision in the entire project.
“People assume the laundry has to stay where it is because that’s where the plumbing runs. It doesn’t. Moving plumbing within the same footprint is one of the cheaper structural changes you can make in a renovation. If the laundry’s in the wrong spot, fix it now — because in five years you’ll still be carrying baskets up the same stairs.”
— Dorothy Li, Design Manager, Superior Renovations
8. The Small Accessibility Decisions You’ll Wish You’d Made
Nobody renovating in their 40s wants to talk about ageing in place. Fair enough. But the small accessibility decisions aren’t about that — they’re about every parent who visits, every guest with a knee injury, every kid on crutches after a rugby season, and every version of you fifteen years from now.
The decisions are tiny. A walk-in shower with a flush threshold instead of a 150mm step. Doorways at 820mm instead of 760mm. Lever-handle taps instead of round knobs. A power point at chair-height in the lounge. A vanity at 900mm instead of 850mm. None of these things make a house look “accessible.” They just make it work for more people, for longer.
A flush-threshold shower in a bathroom renovation costs roughly the same as a stepped one — sometimes slightly more for waterproofing detailing. Wider doorways during a full house reno add about $80–$150 per opening when the framing is already exposed. Lever handles cost the same as knobs from Reece and most other tapware suppliers. The cumulative cost of all the small accessibility decisions in a typical Auckland reno is usually under $1,500. The cost of retrofitting any of them later is roughly ten times that.
💡 Quick tip: The “ageing in place” frame puts people off. Try the “elderly parent visits at Christmas” frame instead. The same decisions, but the people who benefit from them are people you already know and love.
9. The Trendy Tile, Colour, or Finish That Screams “Renovated in 2023”
Every era of Auckland renovation has its tells. The 90s did sponged paint and oak veneer. The 2000s did black granite benchtops and tuscan reds. The 2010s did subway tile and Edison bulbs. The 2020s will be remembered for matte black tapware, deep green cabinetry, and herringbone everything.
None of these things are wrong on the day they go in. They date badly because they’re loud and specific, and because they’re attached to fixed elements — tile, paint, cabinetry, tapware — that are expensive to change.
The fix isn’t to ban trends entirely. It’s to put the trend in the cheap-to-change layer, not the expensive-to-change layer. Tapware, cushions, rugs, art, lamps, paint on a feature wall, cabinet handles — all of these can be swapped in a weekend. Tile that runs floor-to-ceiling in a bathroom, the colour of a built-in kitchen, the species of timber on a feature ceiling — these are decisions you’re locked into for ten to fifteen years. Make the lock-in decisions calm, and the swap-out decisions bold.
“Look at the Pinterest board you’re using for inspiration. Now imagine the same board in ten years. The pieces that still look right are the calm, anchored ones — natural stone, white oak, simple cabinetry. The ones that already look dated are the loud finishes, the very specific colours, the patterned tile. Put your money in the calm layer, and your personality in the layer you can replace.”
— Eunice Qin, Designer, Superior Renovations
10. Saving Money in the Wrong Places — Cheap Tapware, Cheap Splashback, Cheap Benchtop
When budgets tighten during a renovation, the line items people instinctively cut are the visible ones — tile, tapware, the splashback. That instinct is wrong almost every time. The visible elements are the ones you touch every day, see every day, and judge the quality of the whole renovation by.
Cheap tapware fails first. Plated finishes peel off mixers within three years in Auckland water. Cartridges fail and leak. Cheap engineered stone benchtops chip on the edges and stain around the sink. Cheap splashback tile shows every grout line because the tile itself isn’t flat. Cheap cabinet handles loosen and bend.
The fix isn’t to spend more in total — it’s to spend the same amount, weighted differently. Cut a square metre of floor area before you cut the tapware budget. A premium Reece kitchen mixer costs $400–$900. A budget one costs $120–$200. Across an Auckland kitchen renovation that runs $28,000 to $35,000, the difference is rounding error. Across ten years of daily use, it’s the difference between a tap that still feels solid and one that’s been replaced twice.
“The tapware is the part of the bathroom your hand actually touches. Twice a day, every day, for ten years. If you’ve got $50,000 to spend on a bathroom and you’re saving $300 on the shower mixer, you’re saving on the wrong thing. The right place to find the money is in the gallery-wall stuff — the decorative elements that don’t have to perform.”
— Cici Zou, Certified Designer (NZ Dip. Interior Design), Superior Renovations
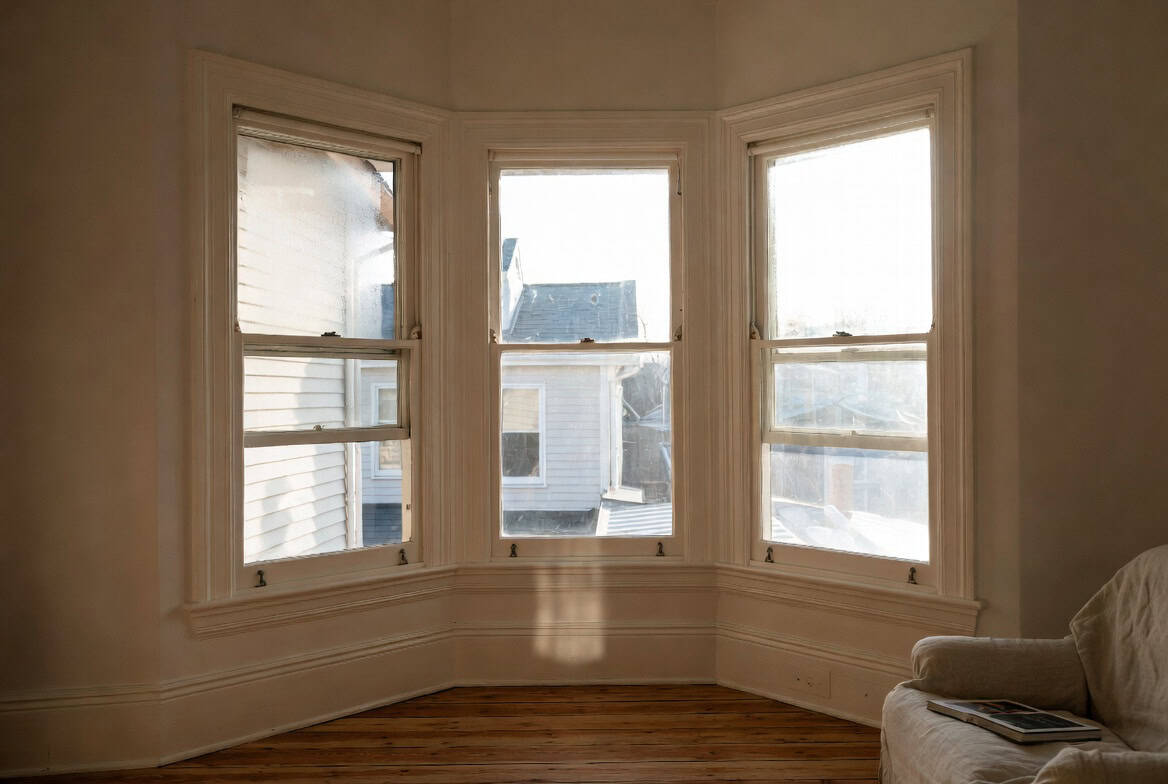
11. The Windows You Didn’t Touch When the Rest of the House Got Done
The single-glazed timber sashes in a Grey Lynn villa look beautiful from the street. They also leak heat at roughly six times the rate of a double-glazed unit. The aluminium windows from a 1980s Glendowie house are functional but lose nearly as much heat. When a renovation rebuilds the kitchen, the bathroom, the layout, the lighting, and the insulation — but leaves the original windows untouched — the house still feels cold.
The fix is timing. Window replacement during an open-wall renovation costs significantly less than the same job as a standalone project, because the wrap, GIB, and architraves are already off. The cost of double-glazing a typical Auckland three-bedroom home in 2026 sits roughly between $18,000 and $35,000 depending on framing material, window count, and whether you keep timber heritage detailing. If your villa is character-controlled, you can usually retrofit double-glazing into the existing timber sashes for slightly more than new aluminium replacements — the heritage look stays, the thermal performance jumps.
A client we worked with in Pt Chev last year double-glazed their full house at the same time as a kitchen-bathroom renovation. The cost was about 22% lower than the standalone quote they’d received the year before, because we were already on site, the windows were already out for re-wrap, and the painter was already booked.
“The mistake is treating the windows as a separate project. They aren’t. Heat moves through the weakest point in the envelope — and in 90% of older Auckland homes, that’s the glass. Renovating around old windows is like buying a new wetsuit and forgetting your hood.”
— Eunice Qin, Designer, Superior Renovations
Renovation Regrets
💡 Quick tip: Our free renovation cost calculator hub includes a double-glazing estimator that gives a rough Auckland figure based on your home’s footprint and window count. Useful for sanity-checking a window line item before you cut it.
12. The One Regret Behind All the Others — Skipping the Design Phase
If you read back through the eleven regrets above, you’ll notice a pattern. The fix in almost every one of them is “decide this during the design phase, not the build phase.”
That’s not a coincidence. The single biggest renovation regret we hear, across every project, every suburb, and every price tier, is going straight to a builder without a designer. The builder is excellent at building what’s on the drawings. The designer is the one who figures out what should be on the drawings — where the power points go, how the storage flows, whether the freestanding bath gets used or just stared at, how the lighting layers work, whether the laundry’s in the right room, which finishes will date and which won’t.
A typical Auckland design phase runs $4,500–$15,000 on a kitchen or bathroom and $10,000–$30,000 on a full home renovation. On a $140,000 full reno, that’s roughly 5–10% of the total budget. Every single one of the regrets above costs more to fix after the fact than the design phase would have cost to prevent it.
This isn’t us selling design — although we have an in-house design team at our Design Studio in Wairau Valley, and we’d happily talk to you about it. It’s us telling you the pattern we see across 1,000+ Auckland projects. The clients who regret the small stuff are almost always the ones who treated design as a luxury and went straight to a quote. The clients who don’t regret much are the ones who paid for someone to ask all the boring questions before the GIB went up.
“My job isn’t really to design a kitchen. It’s to ask the hundred questions nobody else thinks to ask, so the kitchen we build at the end is the one you actually need. Every regret list I’ve ever read is just a list of those questions that didn’t get asked in time.”
— Dorothy Li, Design Manager, Superior Renovations
The Pattern Behind the Pattern
Look at the twelve regrets again. Every one of them is small. Every one of them costs roughly $300 to $8,000 to fix during the renovation, and three to ten times that to fix afterwards. None of them are about choosing the wrong builder, blowing the budget, or making a catastrophic mistake. They’re about the dozen decisions nobody told the homeowner mattered until it was too late to make them.
That’s the reframe we’d offer. A renovation isn’t a thing you build — it’s a hundred decisions you make, and the ones that come back to bite you are almost always the ones you didn’t realise were decisions in the first place.
The fix, in almost every case, is to sit down with someone whose job it is to ask the right questions before the work begins. That’s what design is. That’s what the team at our showroom at 16B Link Drive, Wairau Valley does every week with homeowners across Auckland — from the first sketch through to the final material selection. We’ve done it on 1,000+ projects, and the regret pattern is consistent enough that we now treat the design conversation as the single highest-value hour of the entire renovation.
➡ Book your free in-home consultation with Superior Renovations
➡ Visit our Auckland Design Studio at Wairau Valley
➡ Request a free feasibility report for your project
FAQ — Auckland Renovation Regrets, Answered
What's the most common renovation regret in Auckland?
Across 1,000+ Auckland projects we've completed, the single most common regret is going straight to a builder without a designer. Specific physical regrets — too few power points, undersized storage, the freestanding bath nobody uses — almost always trace back to skipping the design phase. The fix is to invest 5–10% of the total budget in design before any GIB comes off.
How much does it cost to add more power points during a renovation?
During a kitchen or bathroom renovation, doubling the power points typically adds $300–$700 to the electrical scope while the walls are open. After the renovation is finished, the same work costs roughly three to four times that because GIB needs to be cut, repaired, and repainted. The fix is to over-spec power points during the design phase rather than retrofit later.
Are freestanding baths worth it in Auckland bathrooms?
Freestanding baths are worth it if you actually take baths. If you can't remember the last time you used one, you'll probably regret installing it. The bath takes 230 litres of water, dominates the bathroom layout, and pushes the shower into a smaller corner. For most Auckland clients without small kids, a generous walk-in shower with a high-quality fixed bath replaced by a shower zone delivers more daily value.
How much does retrofit insulation cost during an Auckland renovation?
Retrofitting insulation while walls are open during a renovation typically costs $4,000–$8,000 for a 120m² Auckland home, depending on wall and ceiling scope. The same upgrade after the renovation is finished costs $14,000–$20,000 because GIB has to come off again. NZ Building Code H1 standards for Auckland (Climate Zone 1) call for R-2.0 walls and R-6.6 ceilings on new builds — older homes rarely meet this.
What's a renovation design phase and why does it matter?
The design phase is the planning stage of a renovation — typically including scope of work, drawings, material specifications, internal layout decisions, and a final fixed-price quote. It usually costs $4,500–$15,000 for a kitchen or bathroom and $10,000–$30,000 for a full home renovation. Skipping it is the single most common cause of post-handover regrets across the 1,000+ Auckland projects we've worked on.
How much does it cost to double-glaze a house during a renovation?
Double-glazing a typical Auckland three-bedroom home in 2026 costs between $18,000 and $35,000 depending on window count, framing material (timber, aluminium, or thermally broken aluminium), and whether you're retrofitting double-glazed units into existing heritage sashes. Doing the work during an open-wall renovation is usually 15–25% cheaper than the same job as a standalone project, because trades and access are already on site.
Where's the best place to put the laundry during a full house renovation?
The best laundry location is close to the bedrooms (so clothes don't travel through living areas), with at least 600mm of folding bench, separated from kitchen sightlines, and with enough room for a hanging rail or drying space. A combined laundry-mudroom often works well for Auckland homes given the wet half of the year. Moving the laundry within the same building footprint typically costs $4,000–$8,000 and is almost always worth it if the current location doesn't work.
How do I avoid choosing finishes that date quickly?
Put trend-driven finishes in the layer that's easy to swap — tapware, cabinet handles, paint, cushions, rugs, and art. Keep the locked-in layer calm — natural stone, white oak, simple cabinetry, neutral tile. Trends typically date within five to seven years; locked-in elements last fifteen to twenty. The trend layer can be refreshed for a few hundred dollars; the locked-in layer costs tens of thousands to redo.
What's the most underrated upgrade in an Auckland renovation?
Lighting layers — ambient, task, and accent — with dimmers on every circuit. A second lighting circuit and under-cabinet LED in a kitchen renovation typically costs $1,500–$3,500 and is the cheapest, fastest way to make a finished space feel premium. Skipping it leaves you with flat, even ceiling light that flattens the entire room and creates shadows over work surfaces.
How much does a full home renovation cost in Auckland in 2026?
A standard single-level Auckland full home renovation starts from around $140,000 in 2026, and a two-level home from $180,000. The average spend for a full home renovation including kitchen and bathrooms typically falls between $80,000 and $160,000 depending on home size, scope, and product choices. These figures are based on Superior Renovations' 2026 pricing.
Do I need consent for a renovation in Auckland?
Most cosmetic renovations don't require Auckland Council building consent — repainting, replacing fixtures, re-tiling, swapping cabinetry. Consent is generally required if you're moving plumbing waste pipes, altering load-bearing structure, changing the building footprint, or doing work that affects fire safety or weathertightness. A licensed renovation company handles consent applications as part of the project scope. See building.govt.nz for the full list of consent-exempt work.
What should I bring to a first design consultation?
Bring photos of every cupboard and storage area in your current home, your Pinterest board or magazine clippings, a rough budget range, a list of what's not working in the current space, and any council documents you have about the property (LIM report, code compliance, prior consents). The more concrete information you bring, the more useful the first hour is.
Further Resources for your Auckland renovation
- Featured projects and Client stories to see specifications on some of the projects.
- Real client stories from Auckland
Need more information?
Take advantage of our FREE Complete Home Renovation Guide (48 pages), whether you’re already renovating or in the process of deciding to renovate, it’s not an easy process, this guide which includes a free 100+ point check list – will help you avoid costly mistakes.
Download Free Renovation Guide (PDF)
Still have questions unanswered?
Book a no-obligation consultation with the team at Superior Renovations, we’d love to meet you to discuss your renovation ideas!
[contact-form-7]
Or call us on 0800 199 888

Have you been putting off getting renovations done?
We have partnered with Q Mastercard ® to provide you an 18 Month Interest-Free Payment Option, you can enjoy your new home now and stress less.
Learn More about Interest-Free Payment Options*
*Lending criteria, fees, terms and conditions apply. Mastercard is a registered trademark and the circles design is a trademark of Mastercard International Incorporated.
The post 12 Auckland Renovation Regrets (And How to Fix Them) appeared first on Superior Renovations. #superiorrenovations


Comments
Post a Comment